


OBIEE 11 g provides more enhanced interface for Dashboards and Analyses.
Below are the new features in OBIEE 11.1.1.6.
When working with the tables and pivot tables it displays a menu when you right click on it. It all depends on the on the view what we have selected. If you right click on column heading .The interactions are related to column. Ex: Below screenshot.

This change though with 11.1.1.6 and now either the analysis developer, or the end-user, can add create customized report by right-clicking on the view. Let’s work through an example.
Here is an example of a Simple dashboard. The user wants to see which department has Top 3 target revenue in the year 2010 Q3.

So now the user wants 2010 Q1 details. To achieve this scroll down and find 2010 Q3 data. After finding 2010 Q3 details right click and select keep only option.


Now you will have only 2010 Q3 data displayed.
If you wants to see the subtotal of target revenue and fixed cost right click on column heading Product p1 and select show subtotal option. It will display all the totals by product.

If you wants to see the subtotal of target revenue and fixed cost right click on column heading Product p1 and select show subtotal option. It will display all the totals by product.

Now you can also find the row level grand total.

If you want to display Top 3 Products based on the target revenue. Right click on the column
Select Keep only->Top x-> Based on Revenue.

Select Keep only->Top x-> Based on Revenue.

Below you can see Top 3 products in the Q3 quarter.


If the user wants to save this customization report. He can save it in his own account. To do that, you can save this particular dashboard customization, by selecting Save Current Customization from the Edit Page menu in the top right-hand corner of the page, like this:
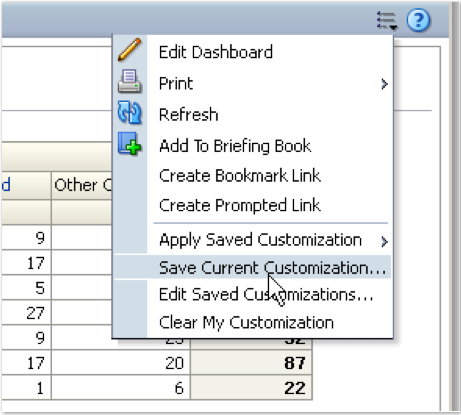

and then choose whether this customization is available as an option for other users, and whether it gets applied automatically whenever this particular user accesses this dashboard page again.


You can also exclude, move, hide and sort the column by right clicking on the column heading.


Selection steps:
Before 11.1.1.6, selection steps could only be added within the analysis editor , and there was no way to display to the end-user what selection steps had been applied, or any way for them to add their own steps. These changes though with 11.1.1.6, and now either the analysis developer, or the end-user, can add selection steps to the analysis by right-clicking on the view. Below is the example.

Before 11.1.1.6, selection steps could only be added within the analysis editor , and there was no way to display to the end-user what selection steps had been applied, or any way for them to add their own steps. These changes though with 11.1.1.6, and now either the analysis developer, or the end-user, can add selection steps to the analysis by right-clicking on the view. Below is the example.

These are the selection steps what we did changes to the dashboard.
Sorting:
If you want to sort the data, right click on the column and you will find the sort option.

If you want to sort the data, right click on the column and you will find the sort option.

Moving columns:
You move the columns to back to the current column, sections, prompts, to the rows.
Moving to the prompts: Right click on the column heading, and select move column,

You move the columns to back to the current column, sections, prompts, to the rows.
Moving to the prompts: Right click on the column heading, and select move column,

Data looks like this after moving to prompts .
Moving data to sections:


Calculated item and Groups:
You can continue to create calculated items to perform mathematical operations on members. In previous releases, you could create a calculated item for an attribute column. In this release, you can create a calculated item for the members of an attribute column or of a hierarchical column.
In this release, you can create a “group” of members to display in a view. The group inherits the aggregation function of the measure column with which it is displayed.


Topic 2
In this example, we have a simple pivot table that returns sales by product category and a stores hierarchy. We’ve applied a filter to the results so that only certain months are included, and we’ve included the filter view in the compound layout so you can see what’s been applied. Here’s the view as seen in the analysis editor, with the stores hierarchy drilled-down to the regions level:

Now new within this release is the ability to right-click on the pivot table view, in this case, and add selection steps, which includes adding groups and calculated items. What’s in the selection step list depends on whether you’re working with attribute columns or hierarchy columns, with the former having less options.

So let’s add one of the new Selection Steps views into the compound layout, like this:

and then we’ll include the analysis in a dashboard page. Now, even in this “published” form, end-users can take the initial set of results, and as well as move the columns around and sort the results as provided previously, they can add their own selection steps. Let’s start by excluding Other USA from the list of Regions:

Now we’ll create a new group containing all of the SF regions, like this:

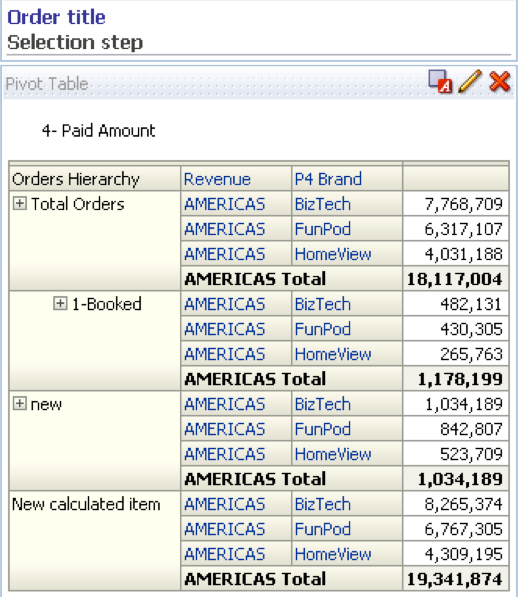
Now, I’m going to create a new calculated item that’s made up of Gifts and Snacks, and replace the existing two product category members with this new calculated item.

So now our analysis is starting to look a lot different, with the selection steps we’ve applied shown in the selection steps view under the main pivot table.

Now let’s add a column-level grand total for each region and grouping on the Y axis, to show the total sale amount for each row.

And then finally, exclude those regions that aren’t in the top three overall, based on Sale Amount across all categories.

So once this is all done, the final version of the pivot table as customised by the end-user, looks a lot different to when it was first viewed, and the additional steps that the user has applied are clearly visible under the pivot table view.

Now any changes that the user has made to this view are only visible to him or her, and haven’t changed the underlying definition of the view. But what if that particular user wanted to save these changes somewhere, so that they could see this customised version of the analysis whenever they logged in into their account? To do that, you can save this particular dashboard customisation, by selecting Save Current Customization… from the Edit Page menu in the top right-hand corner of the page, like this:

and then choose whether this customisation is available as an option for other users, and whether it gets applied automatically whenever this particular user accesses this dashboard page again.

From my perspective, for end-users this is the single-most important new feature in OBIEE 11.1.1.6 that I’m aware of, as it gives the end-user so much more power to customise and further manipulate the results of queries that you present to them in dashboards. When I was using 11.1.1.6 to write the Answers and Dashboards chapter of the book, but it wasn’t yet on general availability, going back to the restrictions of 11.1.1.5 on customer sites was a real pain, as I’d got so used to this new flexibility in presenting analyses to dashboard end-users.
That said, you may not want all analyses to be used in this way, so a new tab has been added to the Analysis Propertiesdialog to allow you to selectively disable these features should you wish.

Another change introduced with 11.1.1.6, but primarily aimed at Exalytics implementations, is the ability to remove the Applyand Reset buttons from prompts. In fact, every optimisation introduced into 11.1.1.6 to do with the dashboard front-end is actually available for all implementations, though you’ll need to consider whether your system is powerful enough to make proper use of them. In the case of removing the Apply and Reset buttons from prompts, you need to be aware that every time you select a value, or move the focus area out of the currently selected value in the prompt, it’ll cause the analysis to refresh and a logical query to be send through to the BI Server, which could get interesting if you’ve got a large data set and a number of users all accessing dashboards at the same time.
So you can disable the Apply and Reset buttons at the individual prompt level, like this:

or at the dashboard page level, like this:

or at the whole dashboard level, using the Dashboard Properties dialog, like this:

Then, assuming you’ve gone ahead and hidden these buttons, prompts will then cause linked analyses and other objects to change their values as soon as you make the selection, giving your users a very interactive and fast dashboard experience, assuming that your underlying database can handle the extra level of activity.

As mentioned earlier, by default dashboard prompts are visible when you install the stock version of OBIEE 11.1.1.6; however, if you’ve bought an Exalytics box, the installation procedure switches all prompts to hide these buttons by default, as the assumption is that you’d want this feature and the underlying database is able to handle the increased load, due to the presence of the TimesTen in-memory cache.
Another set of new features in 11.1.1.6 that this time are for Oracle BI Publisher, are around how you set up new reports and the templates that they use. In previous versions of BI Publisher, you first create a data model and then create a report definition, with the report creation process first prompting you to select a data model from the catalog. Now, when you go to create a new report (New > Report from the common header menu), you’re prompted to either select an existing data model, create a new one, or upload a spreadsheet which creates a corresponding data model for you. Presumably this is because usability reports showed that most people new to OBIEE didn’t realise you had to create a data model before you created a BI Publisher report, and this change makes the process a bit more obvious (plus provides a short-cut to creating reports based off of spreadsheets).

Then, when you actually come to create the report template, you’ve now got the option of going to the regular online layout editor, or you can step through a wizard to help you define the layout template.

This then takes you through a number of steps, where you can select the columns to include, and then further customize the report at the end.


0 comments:
Post a Comment