Oracle Bi Solutions

  • Subscribe to our RSS feed.
  • Twitter
  • StumbleUpon
  • Reddit
  • Facebook
  • Digg
Showing posts with label Oracle Database. Show all posts

Monday, 4 November 2013

OBIEE11g - Custom BI Time Dimension Populate Database Script.

Posted on 00:33 by Unknown

1) Create database function to populate the time table in the database.

CREATE OR REPLACE PROCEDURE update_day_dim (start_date IN DATE, no_of_days IN NUMBER,Delete_data IN varchar2)
AS
   mcount   NUMBER;
   mdate    DATE;
BEGIN
if delete_data = 'Y' then
   delete from xx_bi_time_day_d;
   commit;
end if;
   BEGIN
      mcount := 1;
      mdate := start_date;

      FOR mcount IN 1 .. no_of_days
      LOOP
   
         INSERT INTO xx_bi_time_day_d
              VALUES (TO_CHAR (mdate, 'MM/DD/YYYY'), mdate
                    , TO_CHAR (mdate, 'DD'), TO_CHAR (mdate, 'Day')
                    , TO_CHAR (mdate, 'MM-YYYY'), TO_CHAR (mdate, 'MM')
                    , TO_CHAR (mdate, 'W'), 'W' || TO_CHAR (mdate, 'W')
                    , TO_CHAR (mdate, 'YYYY'), TO_CHAR (mdate, 'Q')
                    , 'Q' || TO_CHAR (mdate, 'Q'), TO_CHAR (mdate, 'Month')
                    , TO_CHAR (mdate, 'MM')
                    , DECODE (TO_CHAR (mdate, 'Q')
                            , '1', 'H1'
                            , '2', 'H1'
                            , 'H2'
                             )
                    , DECODE (TO_CHAR (mdate, 'Q'), '1', '1', '2', '1', '2'));

         mdate := mdate + 1;
      END LOOP;

commit;

   END;
END;*/


2) Create below table in the data base.

create table xx_bi_time_day_d
(current_date  varchar2(15),
current_date_date  date,
day_num   number(15),
day_name   varchar2(25),
period_name  varchar2(15),
period_num   number(15),
week_num     number(15),
week_name      varchar2(15),
period_year varchar2(4),
quater_num    number(15),
quater_name    varchar2(3),
month_name   varchar2(25),
month_num  number(15),
half_year_name varchar2(15),
half_year_num number(15)
);

3) To Populate the data in the time table, Execute the below function.

execute update_day_dim('01-JAN-1980',50000,'Y');


Read More
Posted in Oracle Database | No comments

Thursday, 14 February 2013

How to Start oracel Database 11gR 2 manually on Linux

Posted on 13:19 by Unknown
Steps to start  the Oracle Database 11G R2 manually.

Follow the Steps in each terminal as highlighted below.

Step1:  Starting DB


Step 2:  Starting Listener


You will see the following once excuted the above commands

LSNRCTL for Linux: Version 11.2.0.1.0 - Production on 28-OCT-2012 11:30:22
Copyright (c) 1991, 2009, Oracle.  All rights reserved.
Starting /u01/app/oracle/product/11.2.0/dbhome_1/bin/tnslsnr: please wait...
TNSLSNR for Linux: Version 11.2.0.1.0 - Production
System parameter file is /u01/app/oracle/product/11.2.0/dbhome_1/network/admin/listener.ora
Log messages written to /u01/app/oracle/diag/tnslsnr/Venkat/listener/alert/log.xml
Listening on: (DESCRIPTION=(ADDRESS=(PROTOCOL=tcp)(HOST=Venkat)(PORT=1521)))
Connecting to (DESCRIPTION=(ADDRESS=(PROTOCOL=TCP)(HOST=Venkat)(PORT=1521)))
STATUS of the LISTENER
------------------------
Alias                     LISTENER
Version                   TNSLSNR for Linux: Version 11.2.0.1.0 - Production
Start Date                28-OCT-2012 11:30:23
Uptime                    0 days 0 hr. 0 min. 1 sec
Trace Level               off
Security                  ON: Local OS Authentication
SNMP                      OFF
Listener Parameter File   /u01/app/oracle/product/11.2.0/dbhome_1/network/admin/listener.ora
Listener Log File         /u01/app/oracle/diag/tnslsnr/Venkat/listener/alert/log.xml
Listening Endpoints Summary...
  (DESCRIPTION=(ADDRESS=(PROTOCOL=tcp)(HOST=Venkat)(PORT=1521)))
The listener supports no services
The command completed successfully

Step 3 :  Starting DBconsole


Read More
Posted in Oracle Database | No comments

Oracle SQL Developer :Enter full path for java.exe

Posted on 12:36 by Unknown
I have encountered this issue a couple of times and in many places they say to download different jdk versions from the site but couldn't find the actual root cause and to resolve the issue

Cause

When we apply the java path it is not able to register the path in the config file of the Oracle SQL Developer. For that we have to insert the path manually which is shown below.

Solution

1. Browse through the path mentioned below

D:\app\Jethin\product\11.2.0\dbhome_1\sqldeveloper\sqldeveloper\bin

2. Edit the file sqldeveloper.config


3. Add the line which directs to the full java path in your system


4. Now click on the sql developer and it is good to run
Read More
Posted in Oracle Database | No comments

Sunday, 20 January 2013

[Oracle Database] - Linux OS and Oracle database Step by Step installion process for Oracle 11g R2 on OEL 5.5 on VM Ware

Posted on 11:04 by Unknown

In this step by step tutorial I’m going to show you the installation of Oracle 11gR2 on OEL 5.5
As in every my step by step and video tutorials, I use VMware virtual machine, so here also I start with creating a virtual machine
P.S. Actually I was preparing this tutorial for CentOS, but somehow mixed .iso images  So the name of the virtual machine appears as “CentOS” but the installation is made on OEL. However, you can try the same tutorial for CentOS as well

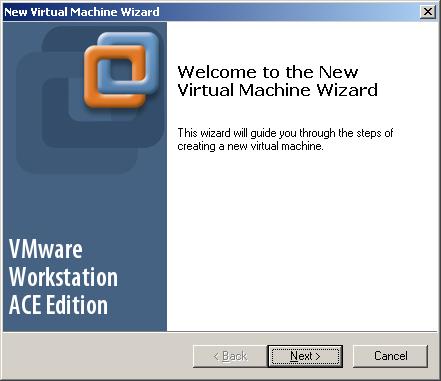
Click Next

Select Typical and click Next

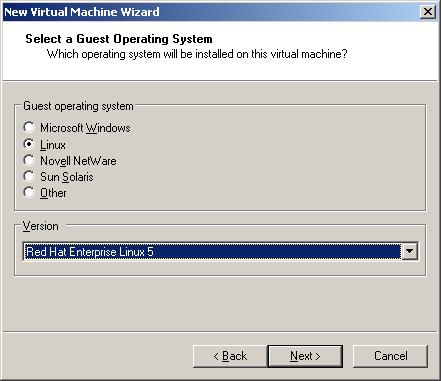
Select Linux and “Red Hat Enterprise Linux 5″ as an OS version and click next

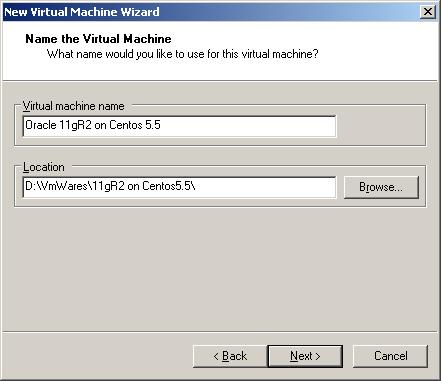
Provide the name of virtual machine and specify the location and click next

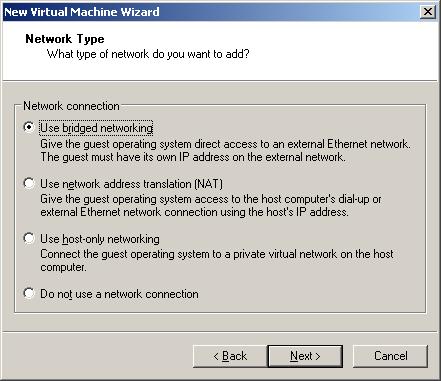
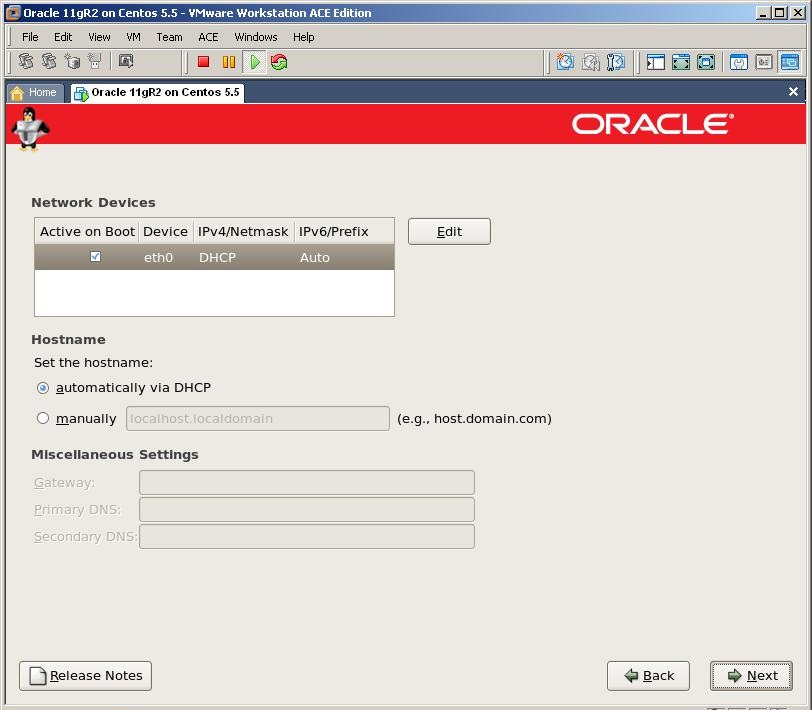
Select “Use bridged networking” and click Next

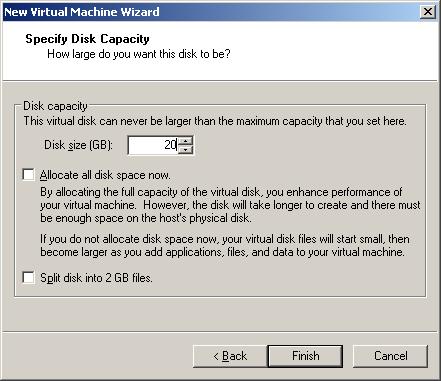
Specify the size of the virtual machine and click Finish

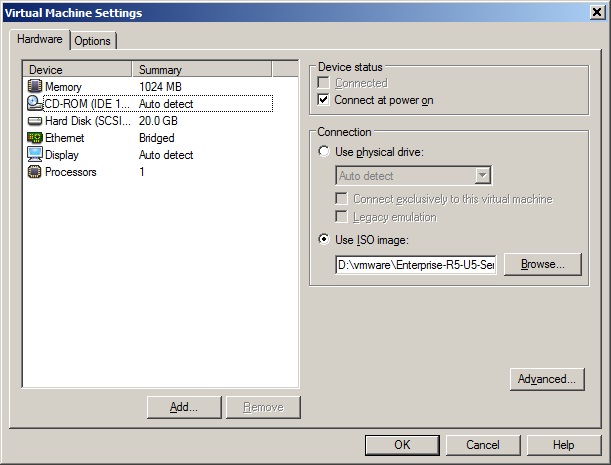
Delete Floppy, USB Controller and Sound Adapter devices, set Memory to 1024 Mb, mount ISO image of the OEL 5.5 OS and click OK

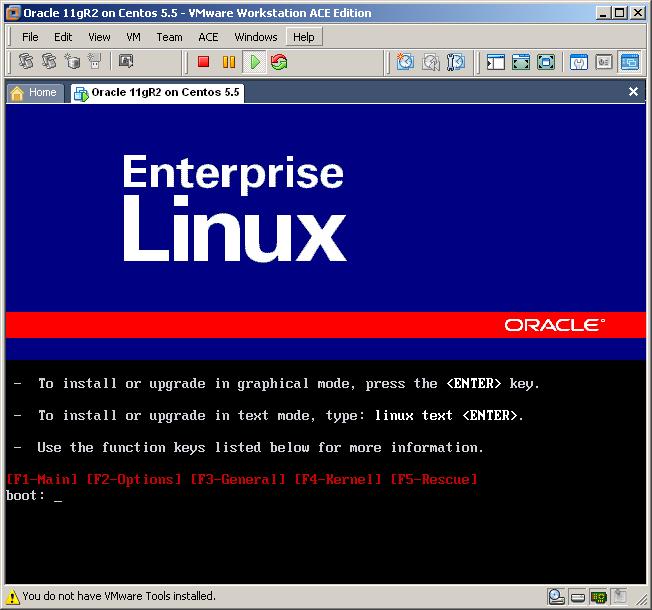
Click “Power on” button to start the virtual machine

Click enter

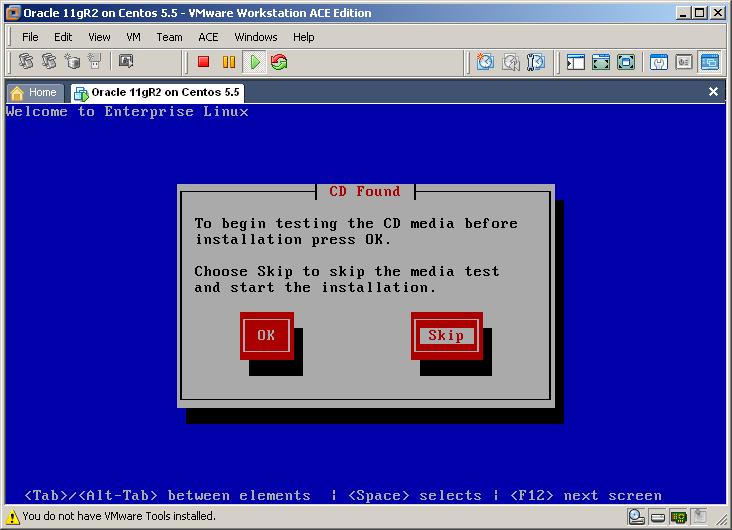
Select Skip button

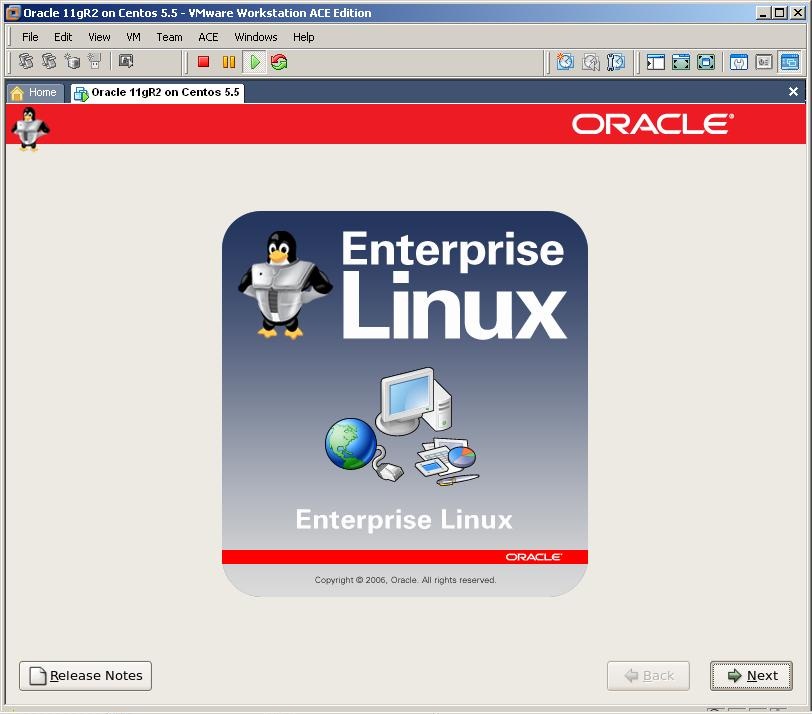
Click Next

Select Installation language and click next

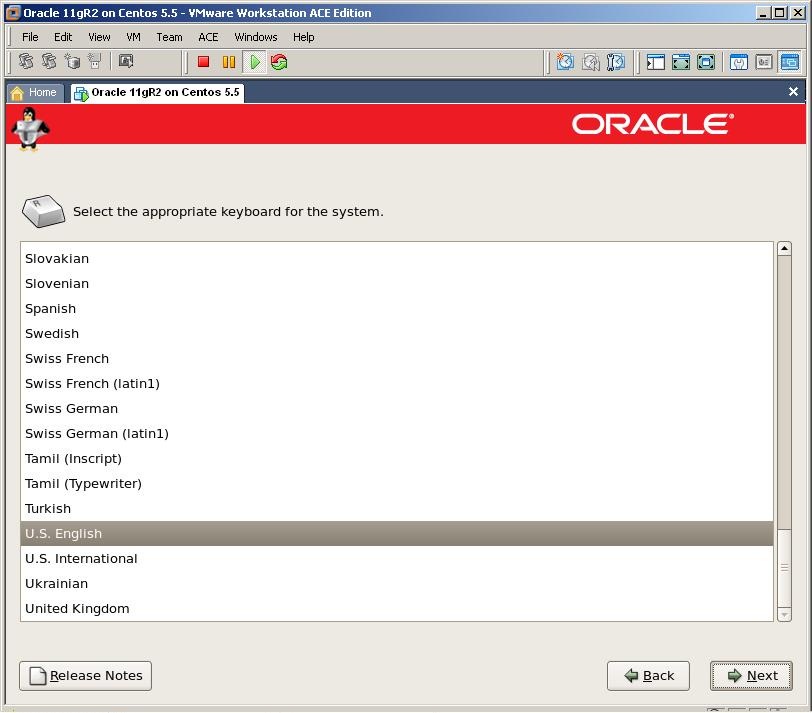
Select the keyboard and click next

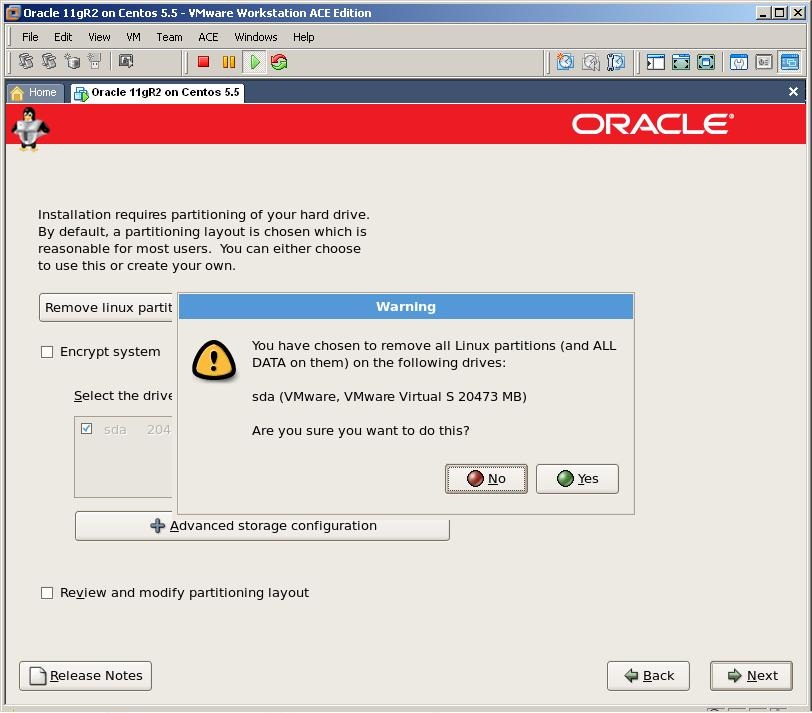
Click on Yes

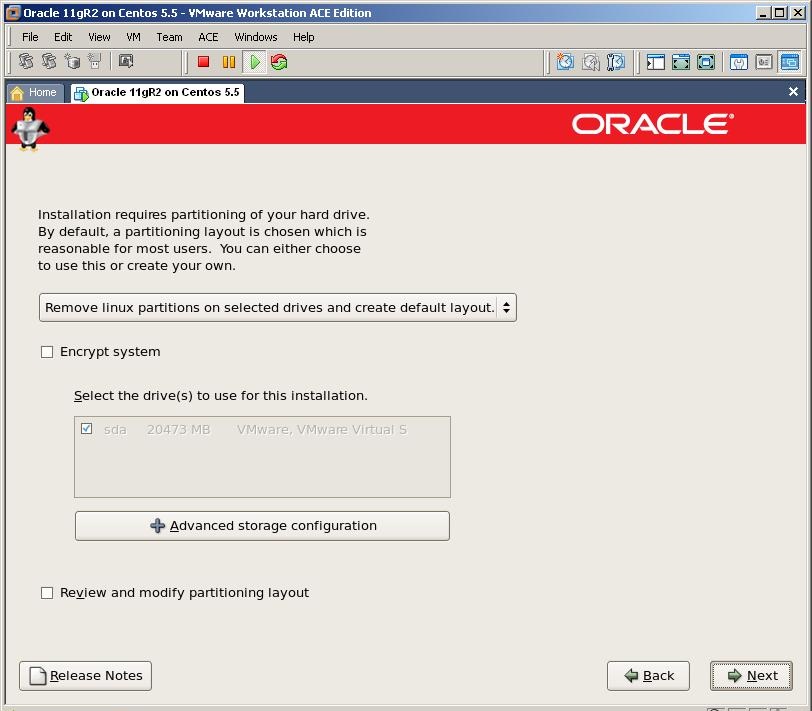
Click Next

Click on YES to remove the partition and click next

Click Next

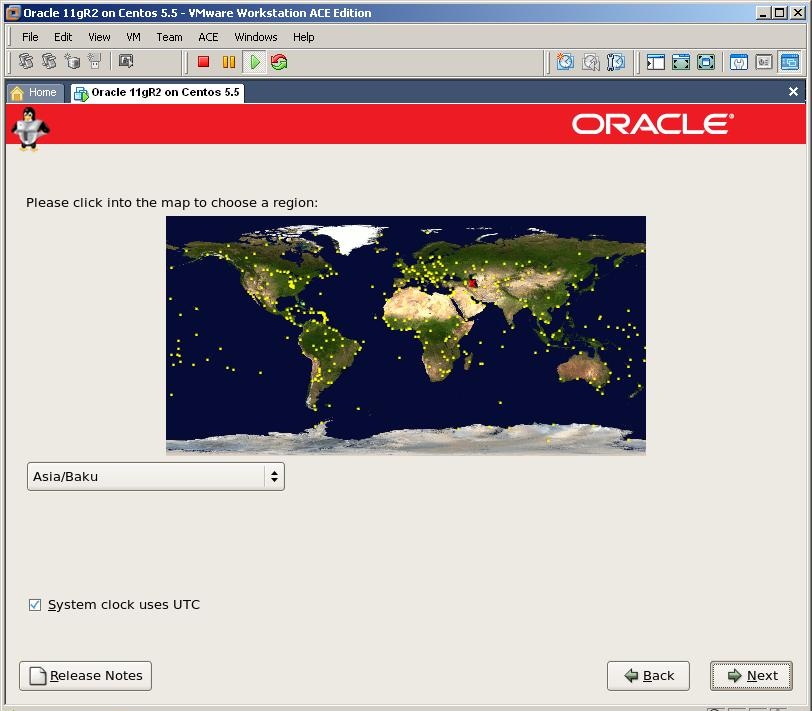
Select the country and click next

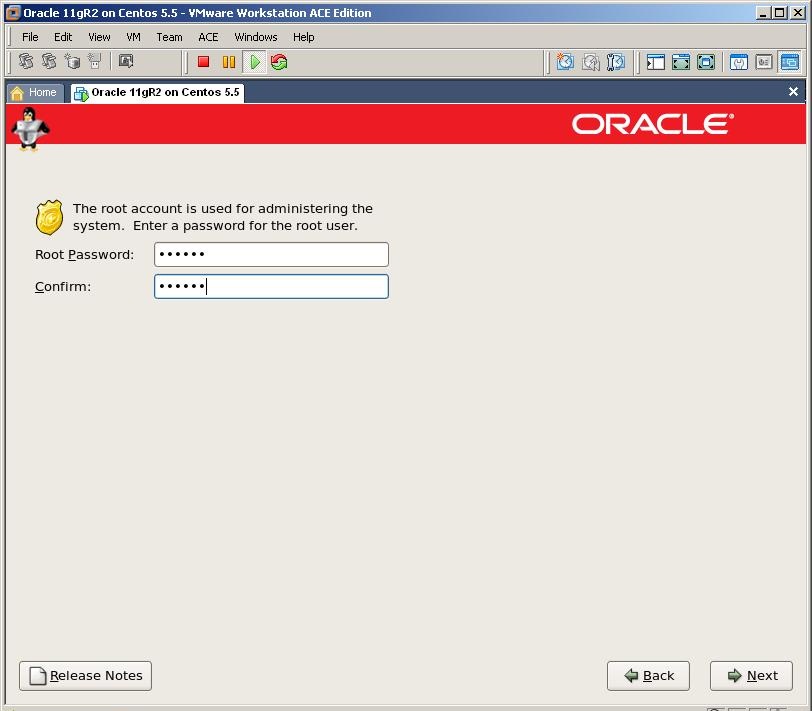
Provide the password of the root user and click next

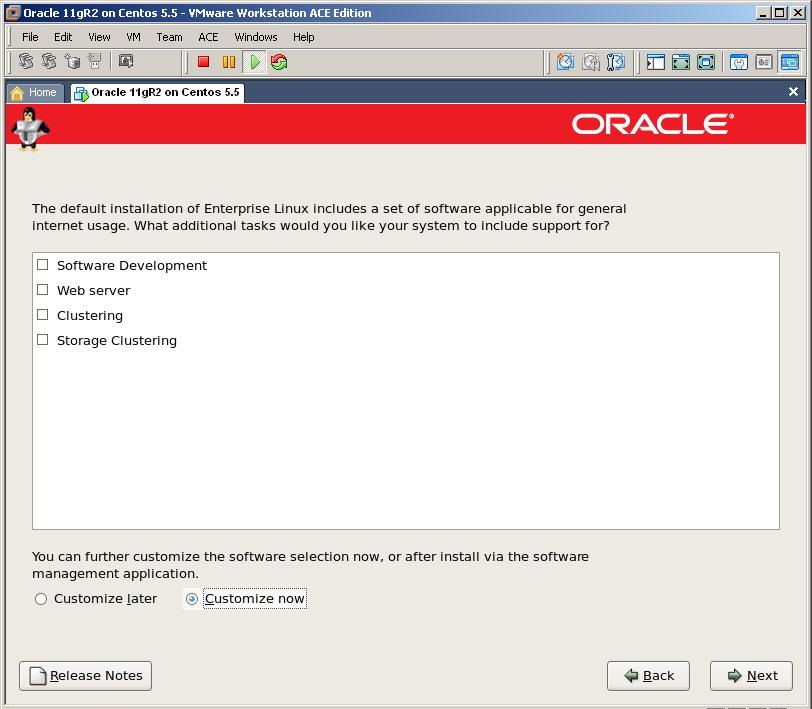
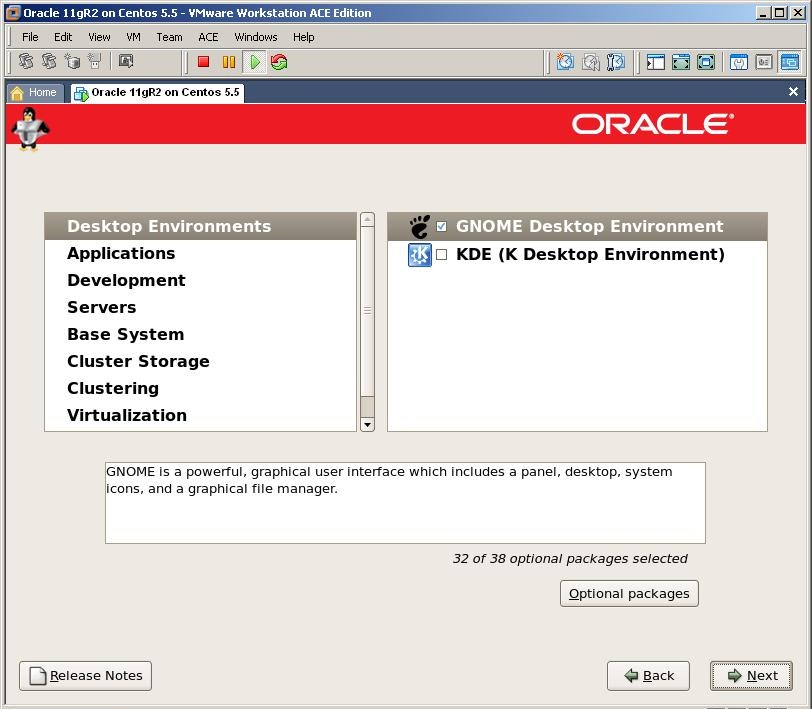
To install required packages for Oracle installation select “Customize now” and click Next

Desktop Environments
                                                  GNOME Desktop Environment
Applications 
                                                  Graphical Internet
Development 
                                                  Development Libraries
                                                  Development Tools
                                                  GNOME Software Development
                                                  Java Development
                                                  Legacy Software Development
                                                  X Software Development  (Select libxpdevel and openmotif)
Servers
                                                  Server Configuration Tools
                                                  Web Server
                                                  Windows File Server
Base System 
                                                  Administration Tools
                                                  Base
                                                  Java
                                                  Legacy Software Support (select compat-db)
                                                  System Tools  (select sysstat)
                                                  X Window System

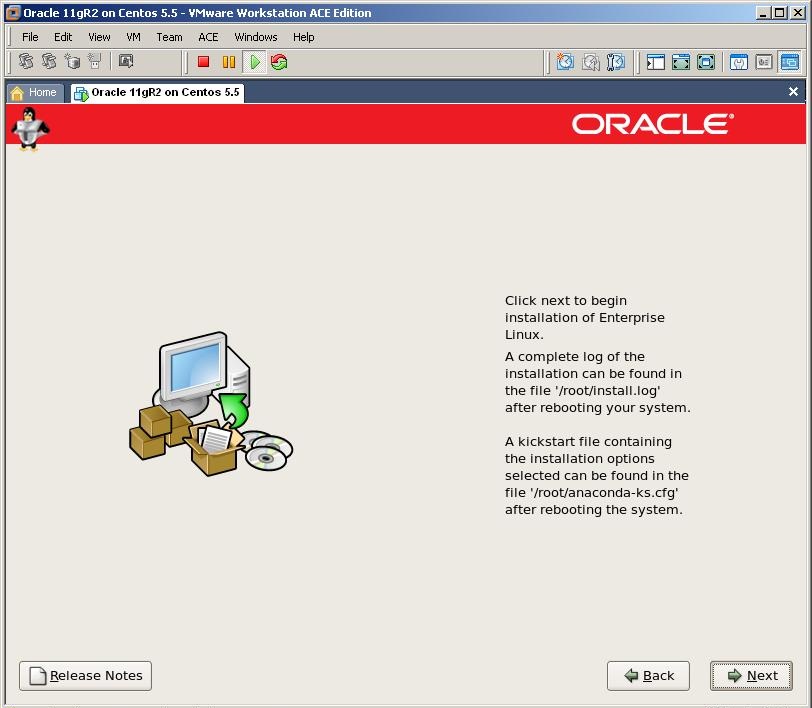
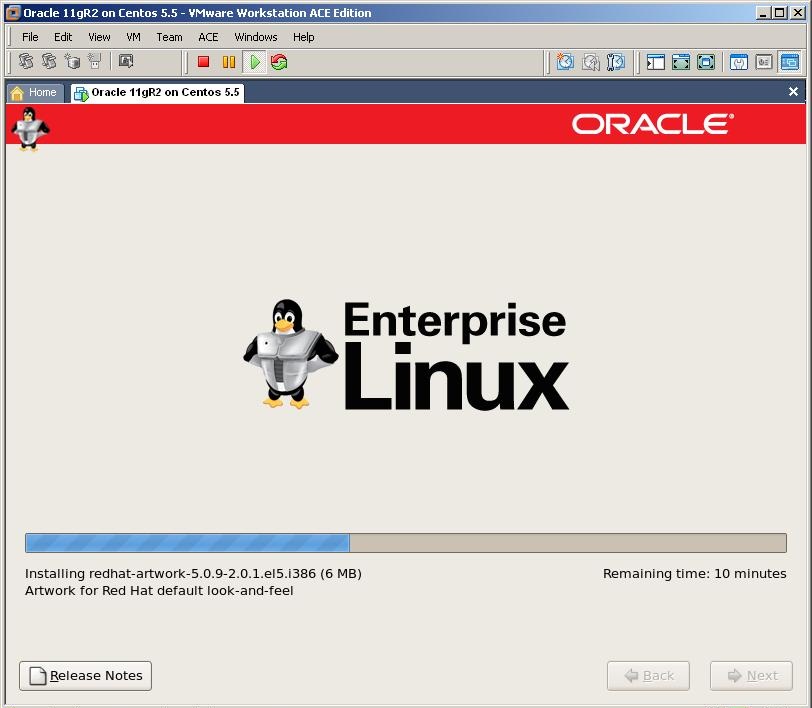
Click Next to start the installation


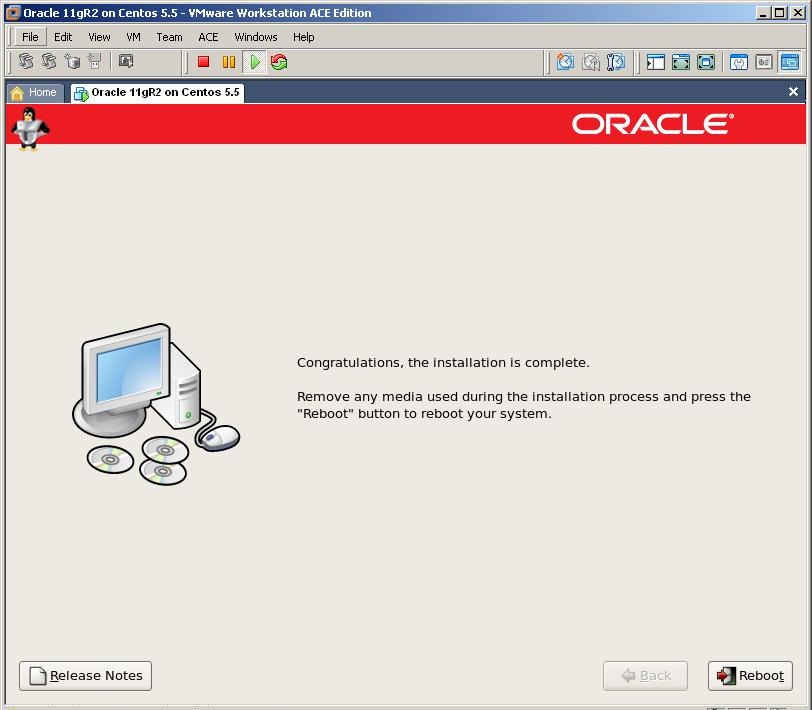
Click on Reboot button

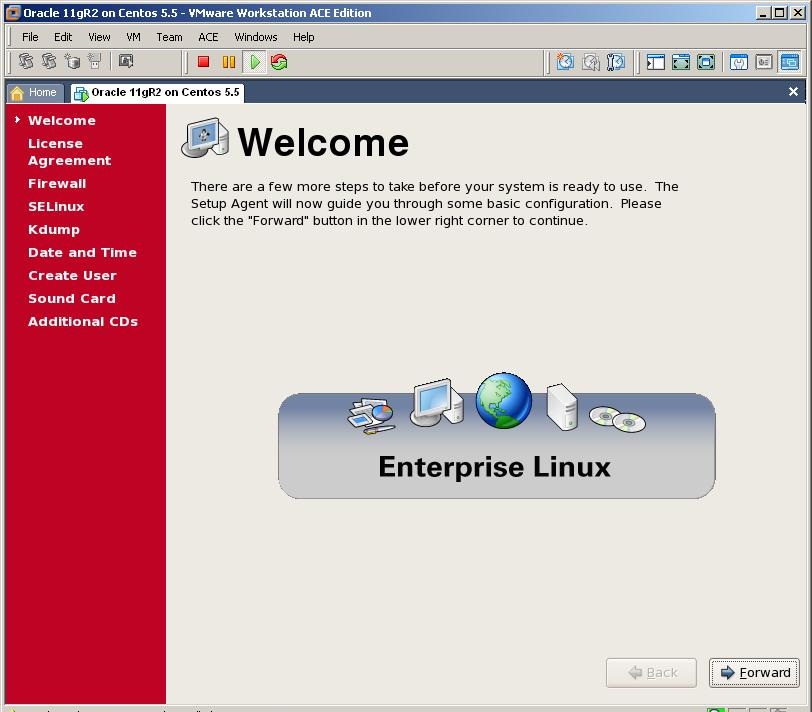
Click Forward

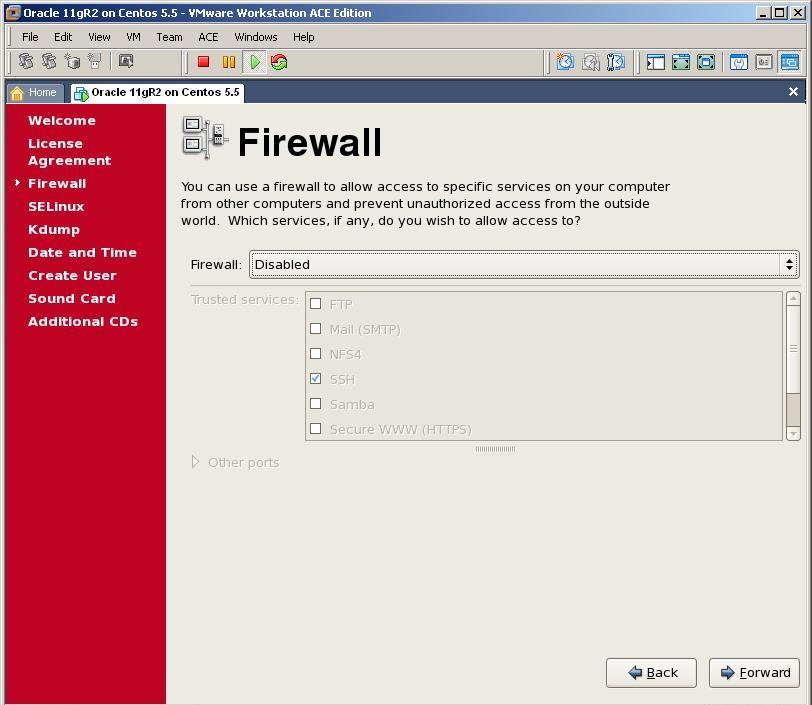
Choose the first option and click Forward

As we use the virtual machine for testing purpose, disable the firewall and click Forward

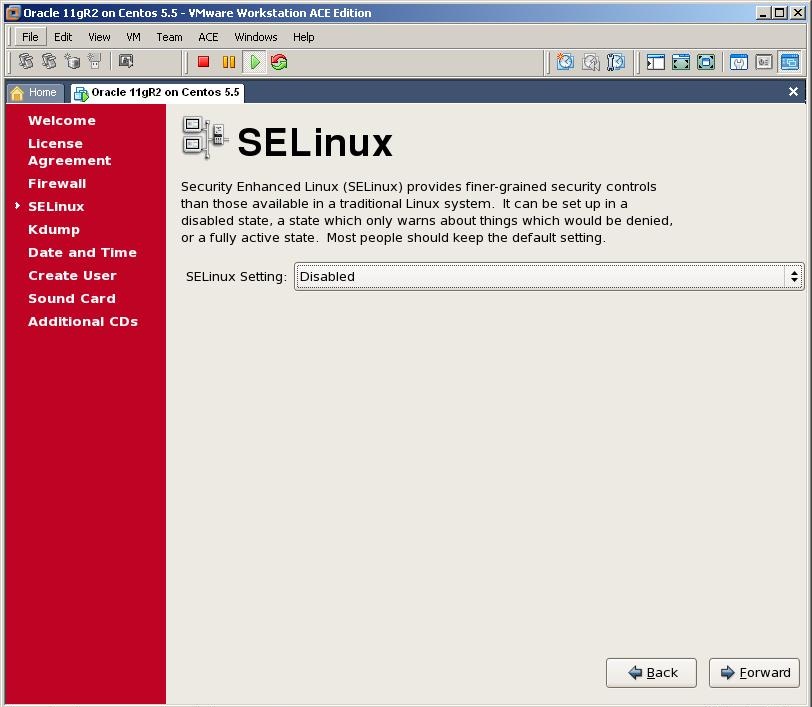
Disable Selinux and click Forward

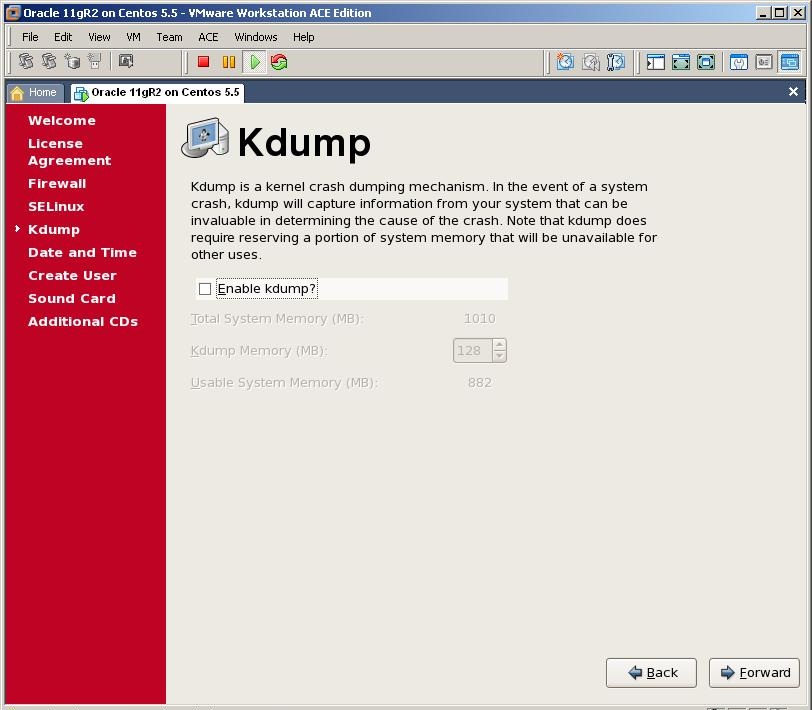
Click Forward

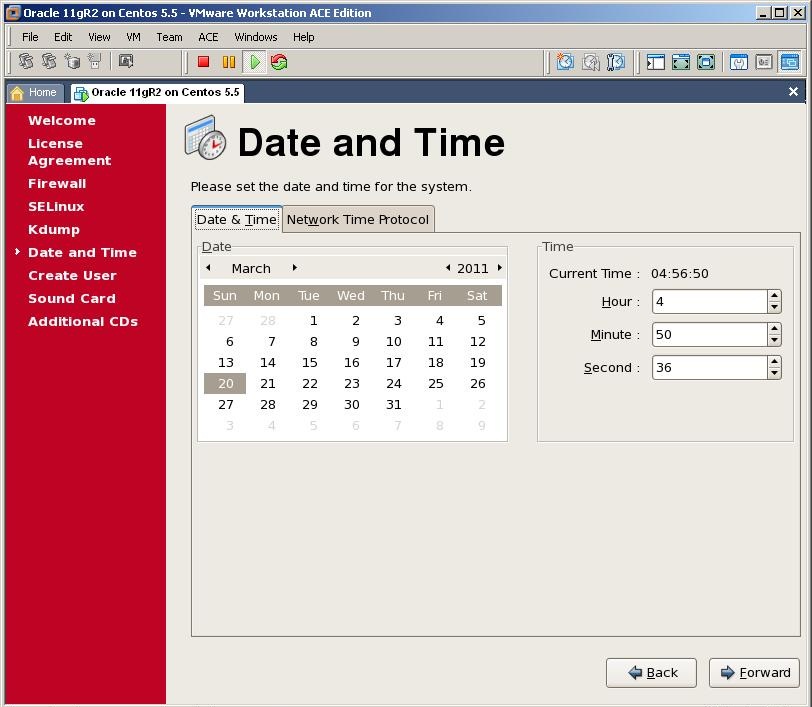
Specify the time and date and click Forward

We don’t need to create a user so click Forward

Click Finish button to finish the installation of OEL

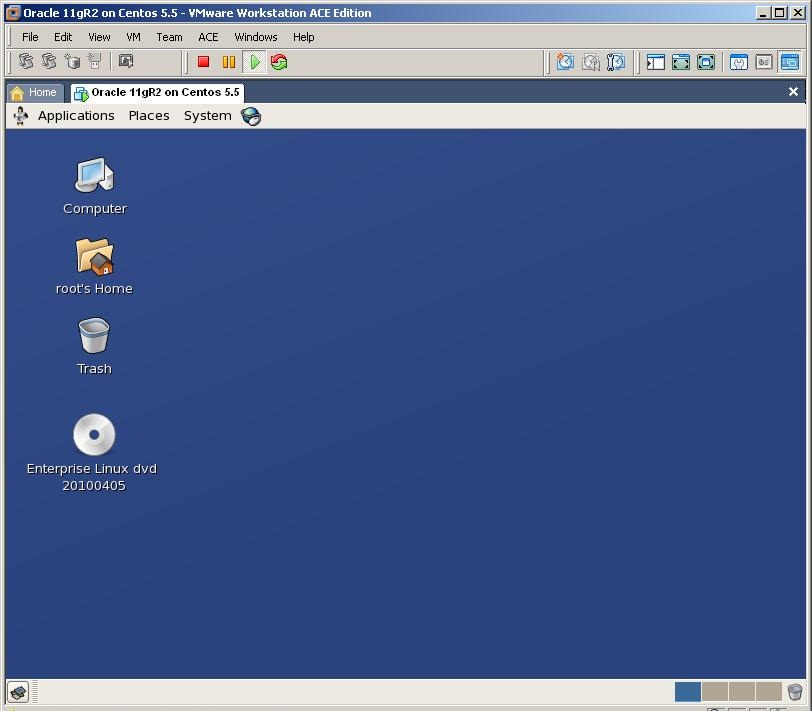
Login with the root user

From VM menu, select Install VMWare tools

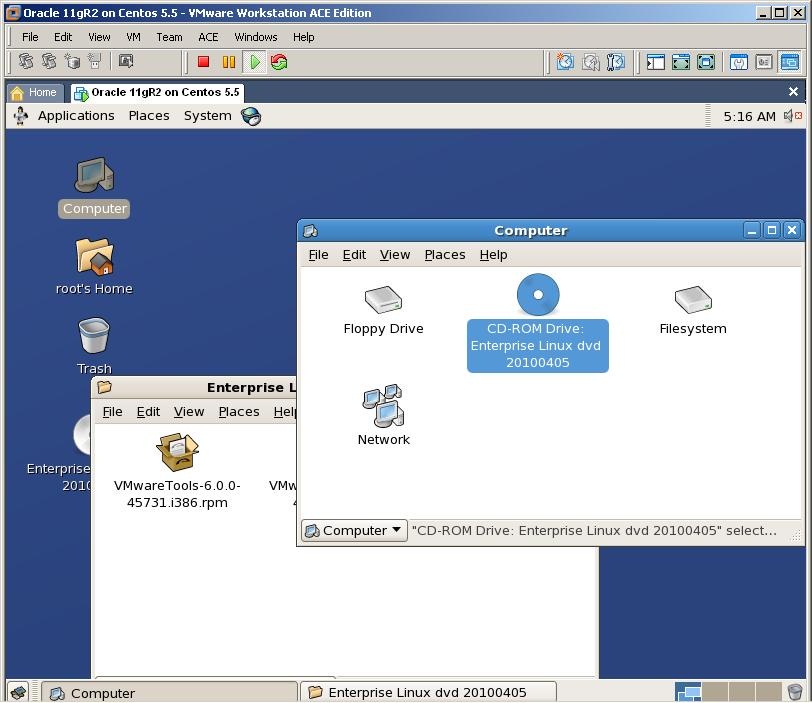
If the vmware installation cd doesn’t appear automatically, Eject the previous cd (installation of OEL), doublt click on Computer and double click on Cd-rom device. This will initialize the vmware tools cd

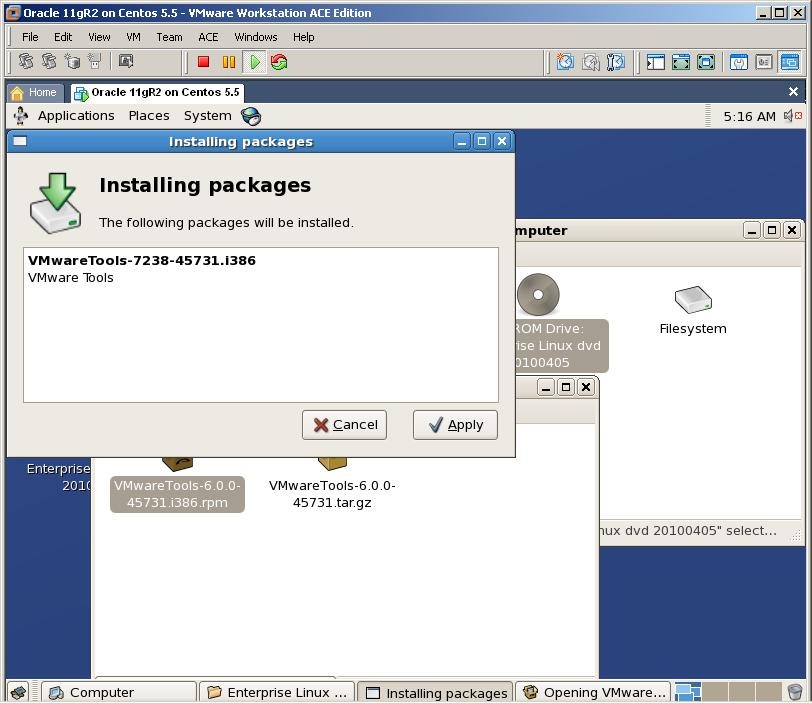
Double click on .rpm package

Click on Apply to start the installation

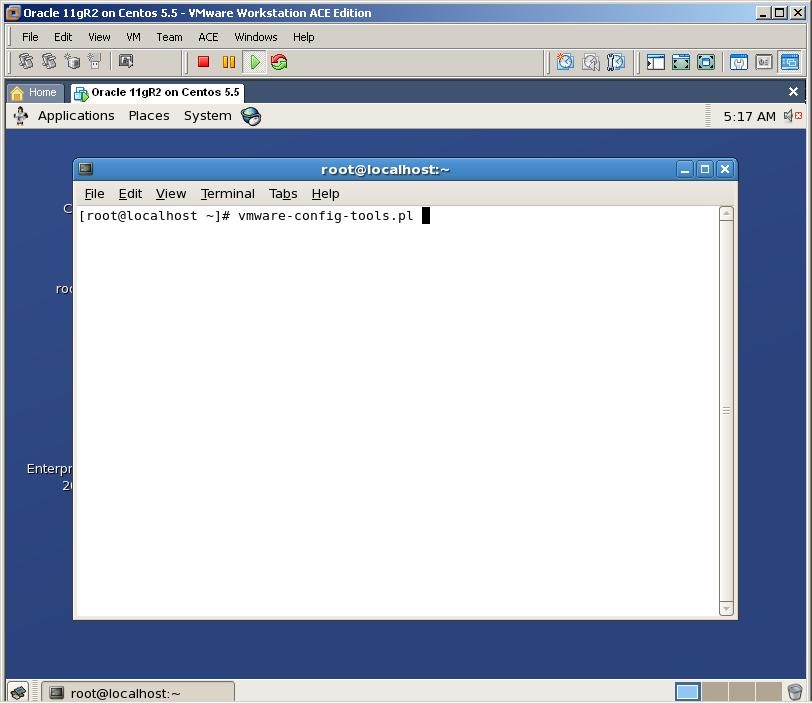
After you set all configurations, open new terminal and run vmware-config-tools executable and finish the installation of vmware tools

Now let’s create a user and groups for Oracle installation
1
2
3
4
groupadd  oinstall
groupadd  dba
useradd -m -g oinstall -G dba -d /home/oracle -s /bin/bash -c "Oracle Software Owner" oracle
passwd oracle

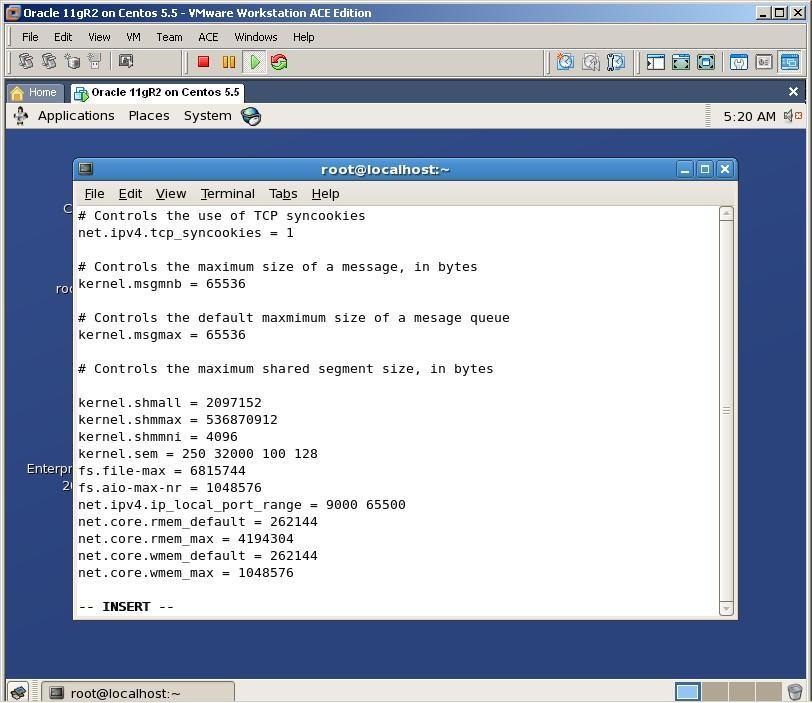
Change the /etc/sysconfig.conf file to add (change) kernel parameters that are required for Oracle installation
The file should be as follows:
1
2
3
4
5
6
7
8
9
10
11
12
13
14
15
16
17
18
19
net.ipv4.ip_forward = 0
net.ipv4.conf.default.rp_filter = 1
net.ipv4.conf.default.accept_source_route = 0
kernel.sysrq = 0
kernel.core_uses_pid = 1
net.ipv4.tcp_syncookies = 1
kernel.msgmnb = 65536
kernel.msgmax = 65536
kernel.shmmax = 2147483648
kernel.shmall = 2097152
kernel.shmmni = 4096
kernel.sem = 250 32000 100 128
fs.file-max = 6815744
fs.aio-max-nr = 1048576
net.ipv4.ip_local_port_range = 9000 65500
net.core.rmem_default = 1048576
net.core.rmem_max = 4194304
net.core.wmem_default = 262144
net.core.wmem_max = 1048576

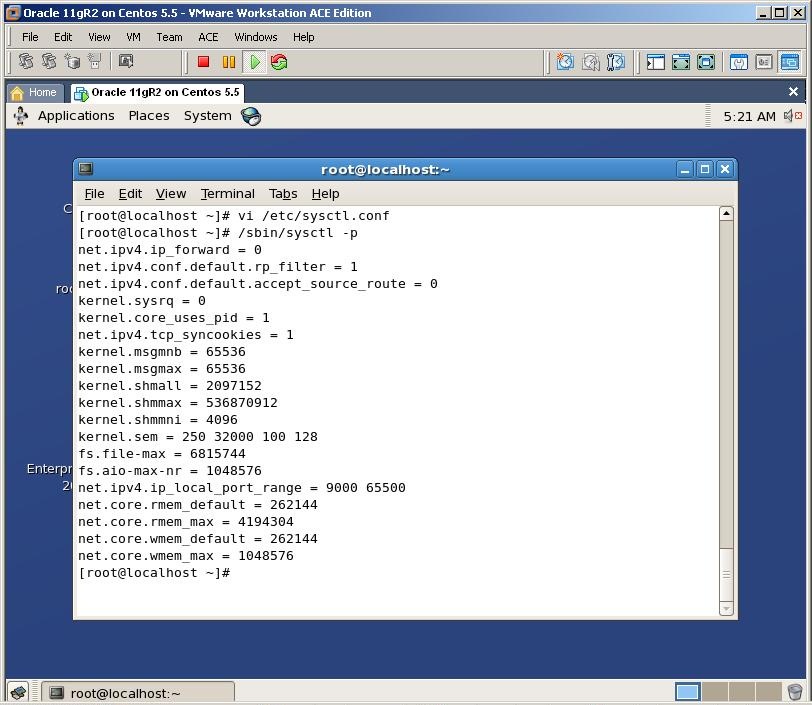
To make the active in the current session, run /sbin/sysctl -p command

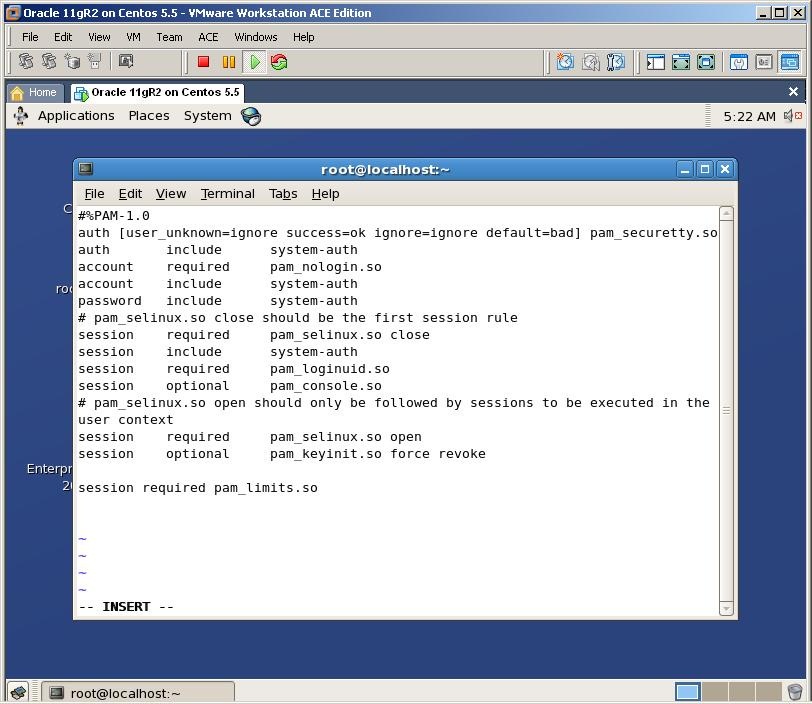
Change /etc/pam.d/login file and add the followingn line:
1
session required pam_limits.so

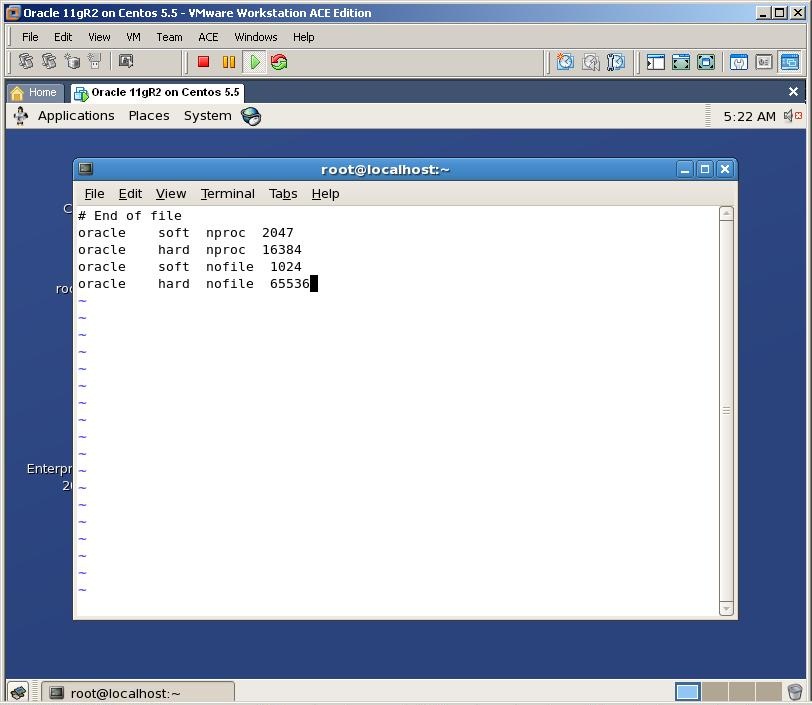
Change /etc/security/limits.conf and add the following lines:
1
2
3
4
oracle              soft    nproc   2047
oracle              hard    nproc   16384
oracle              soft    nofile  1024
oracle              hard    nofile  65536


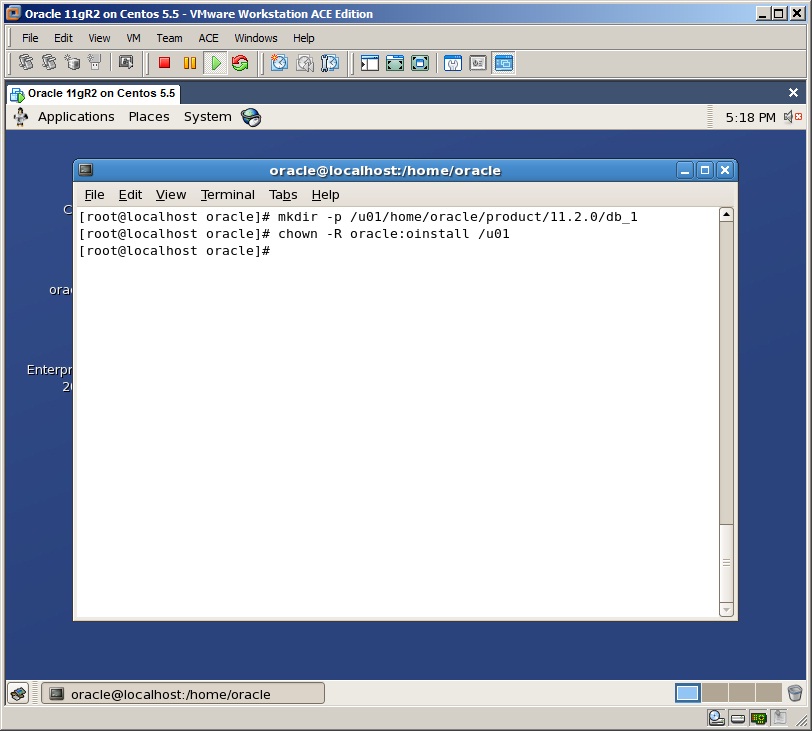
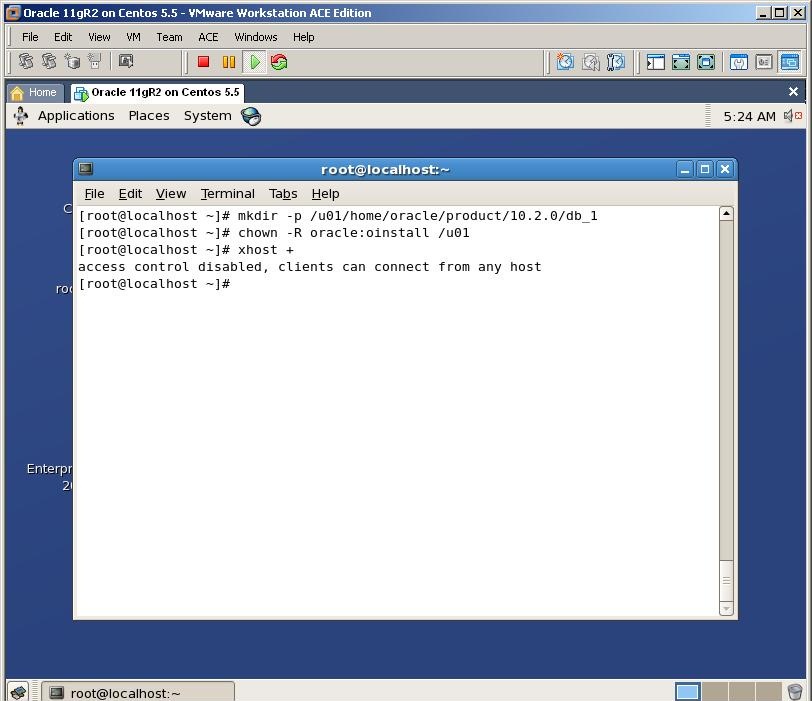
Create necessary directories for Oracle home

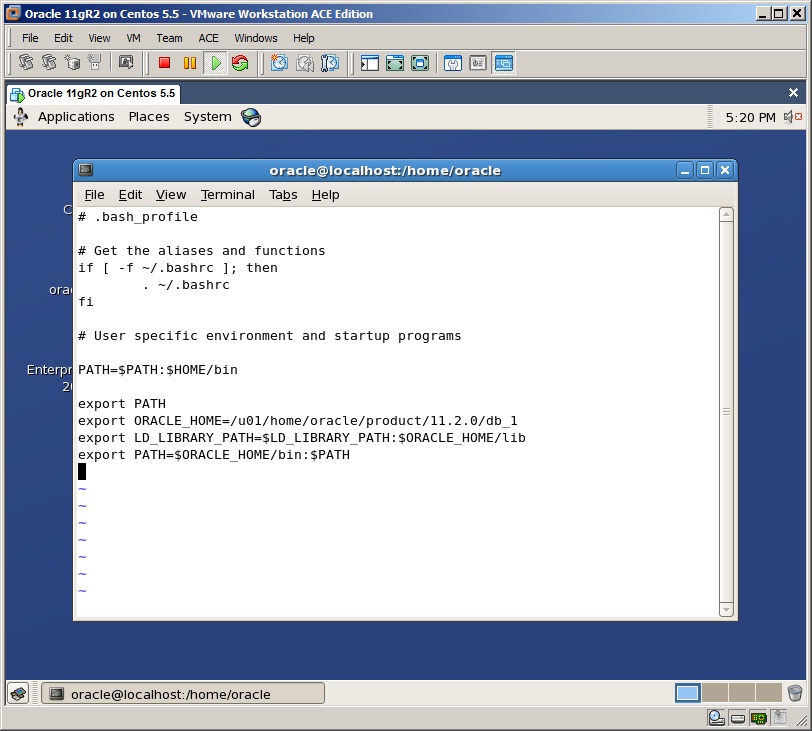
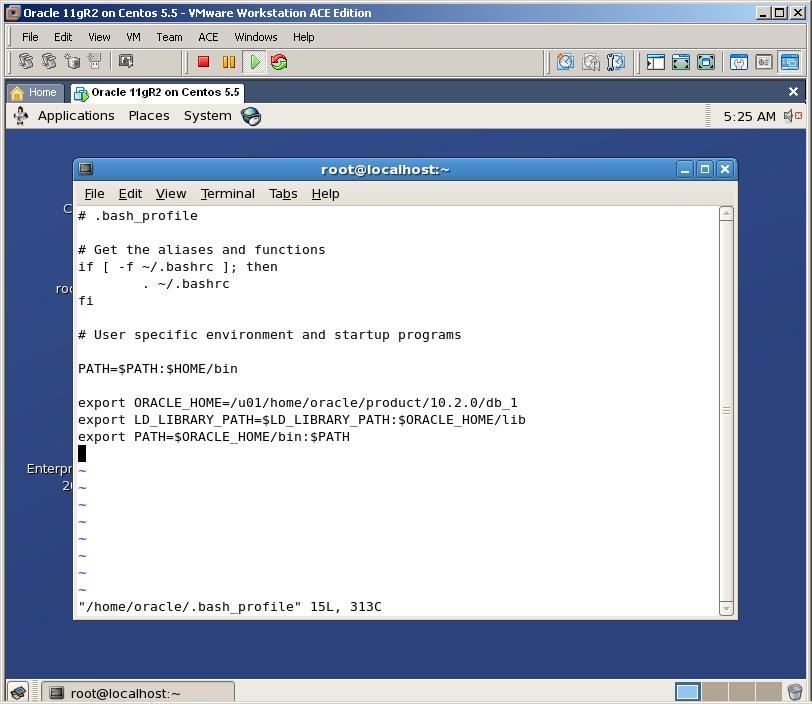
Change the entry of .bash_profile file of the oracle user and add following lines:
vi /home/oracle/.bash_profile
1
2
3
export ORACLE_HOME=/u01/home/oracle/product/11.2.0/db_1
export LD_LIBRARY_PATH=$LD_LIBRARY_PATH:$ORACLE_HOME/lib
export PATH=$ORACLE_HOME/bin:$PATH


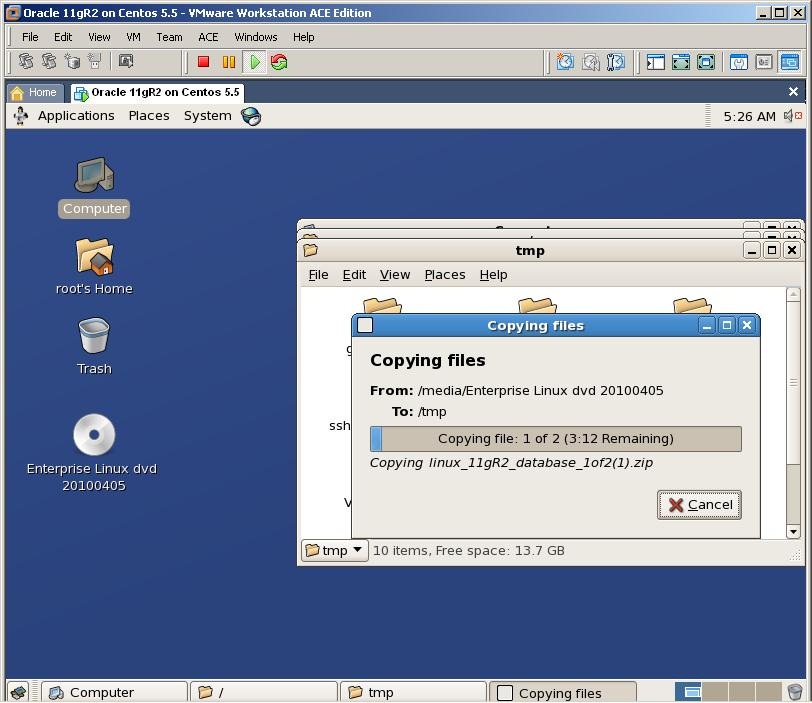
Now copy downloaded oracle installation files to the /tmp directory

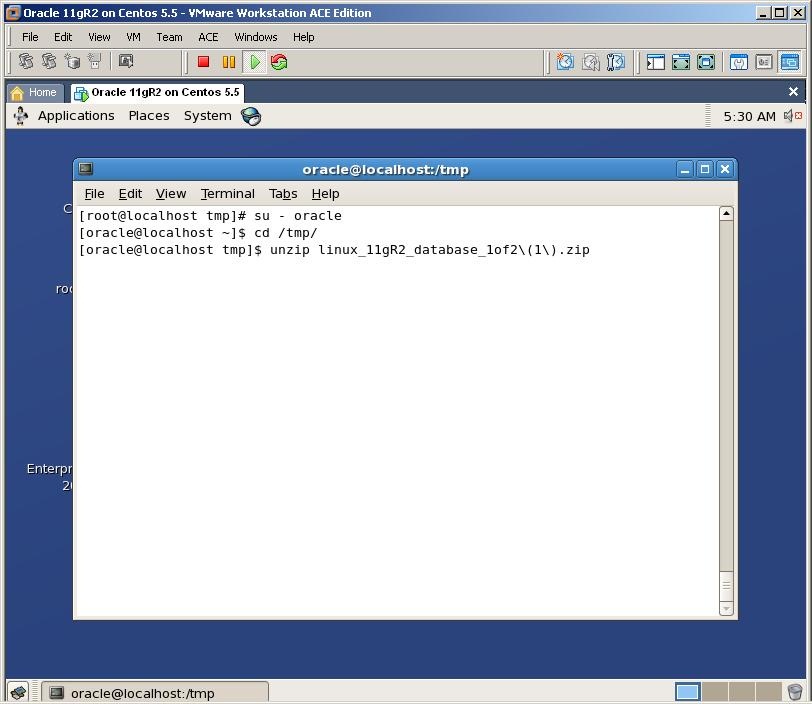
Switch to the /tmp directory and unzip both files with oracle user. This will create a new folder called “database”

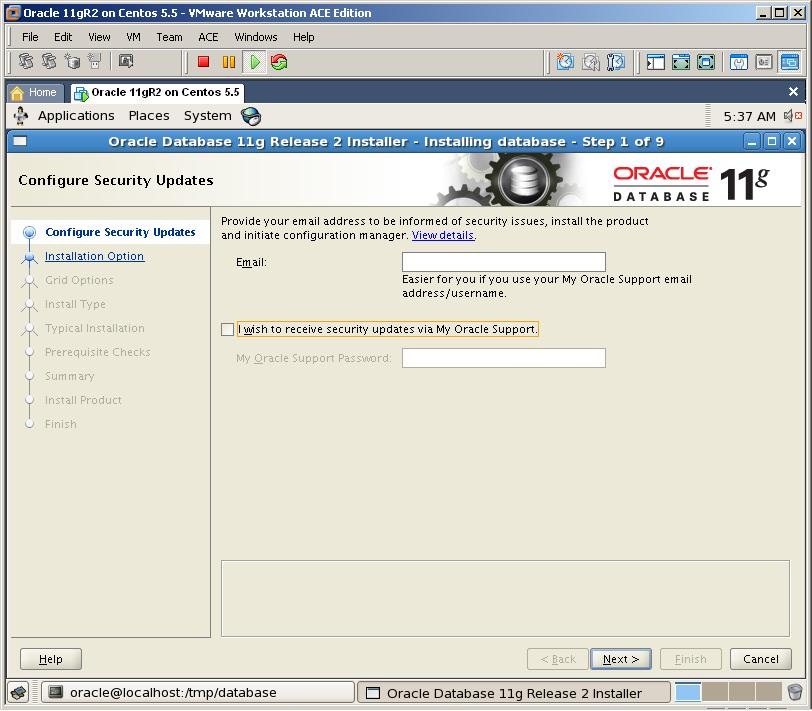
Logout from root user, login with oracle, switch to the /tmp/database directory and run installation by running the following executable
1
2
3
cd /tmp/database
 
./runInstaller


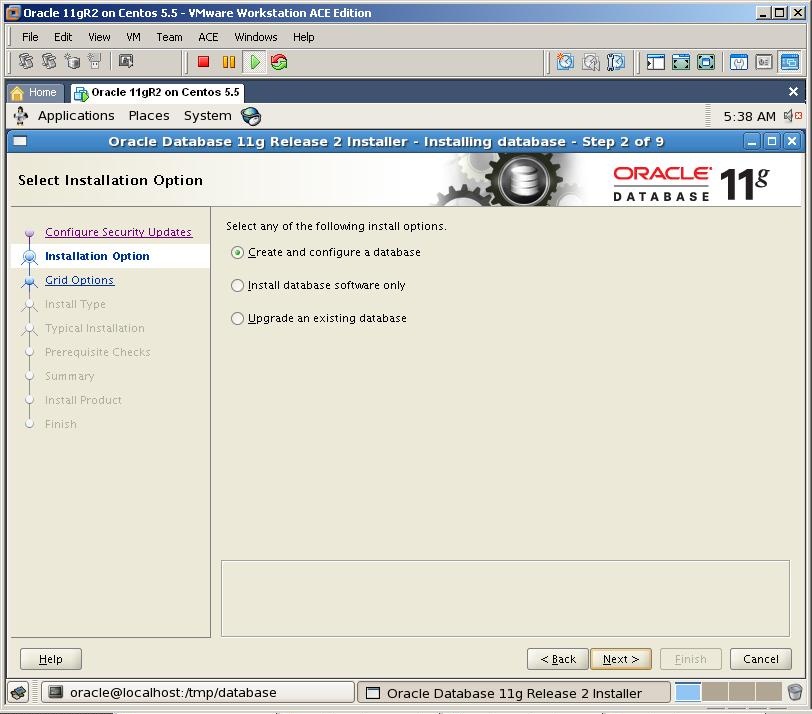
Select Create and configure a database and click next

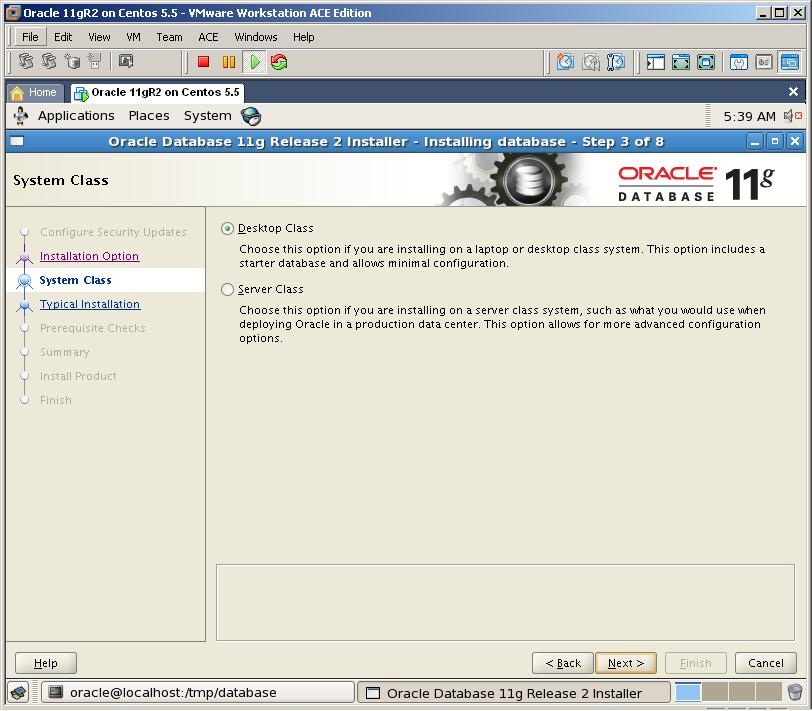
Select the first option and click Next

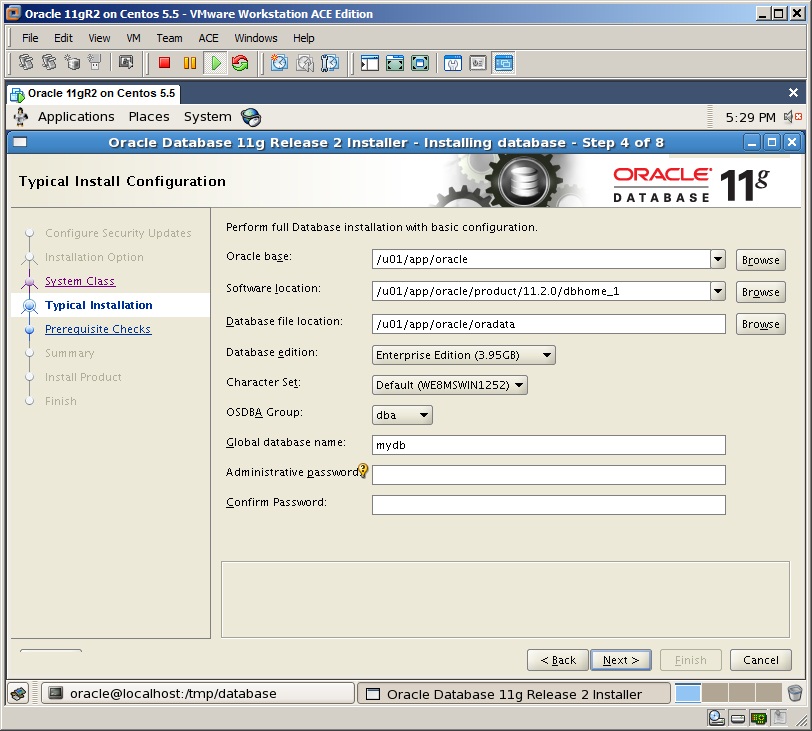
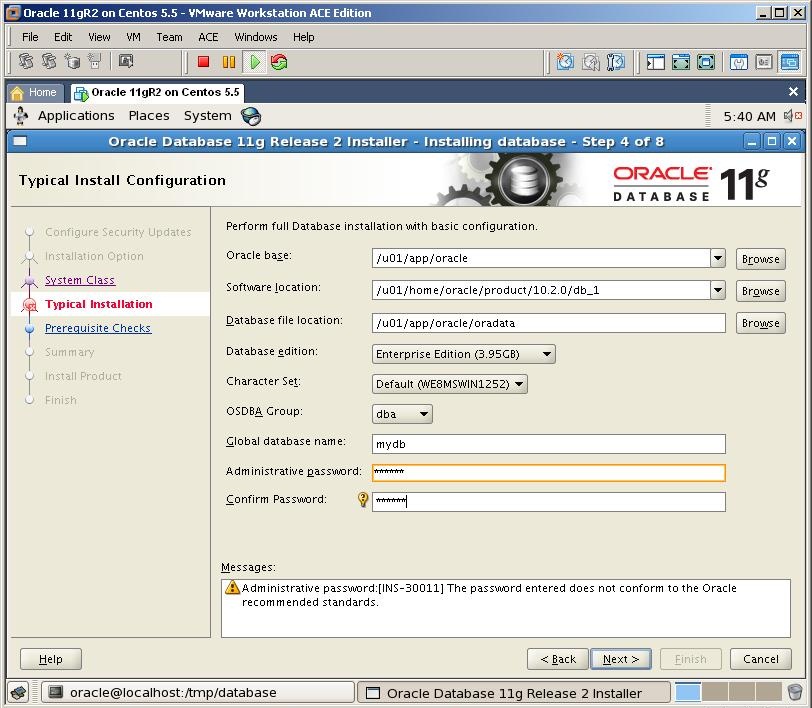
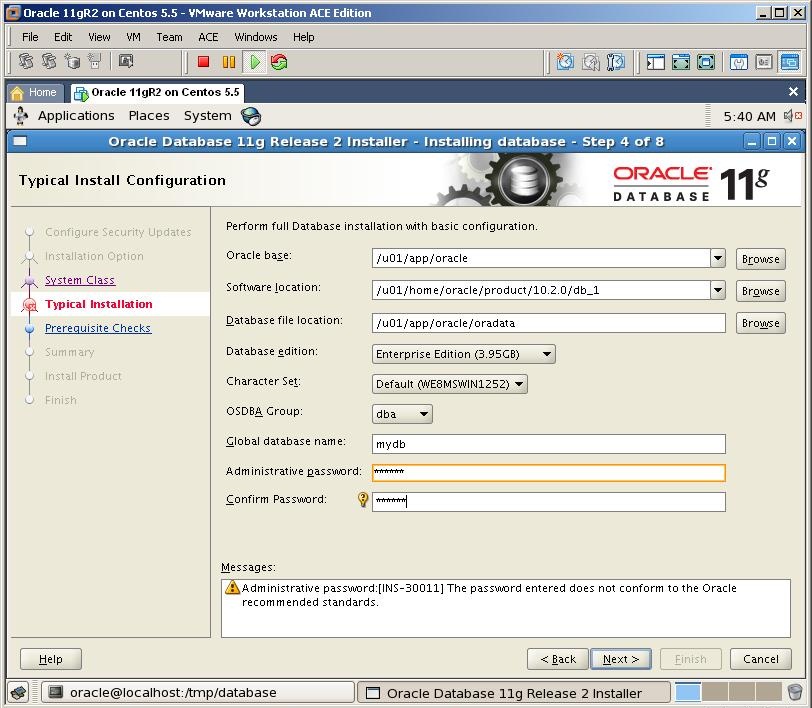
Provide the name of the database and the password and click next


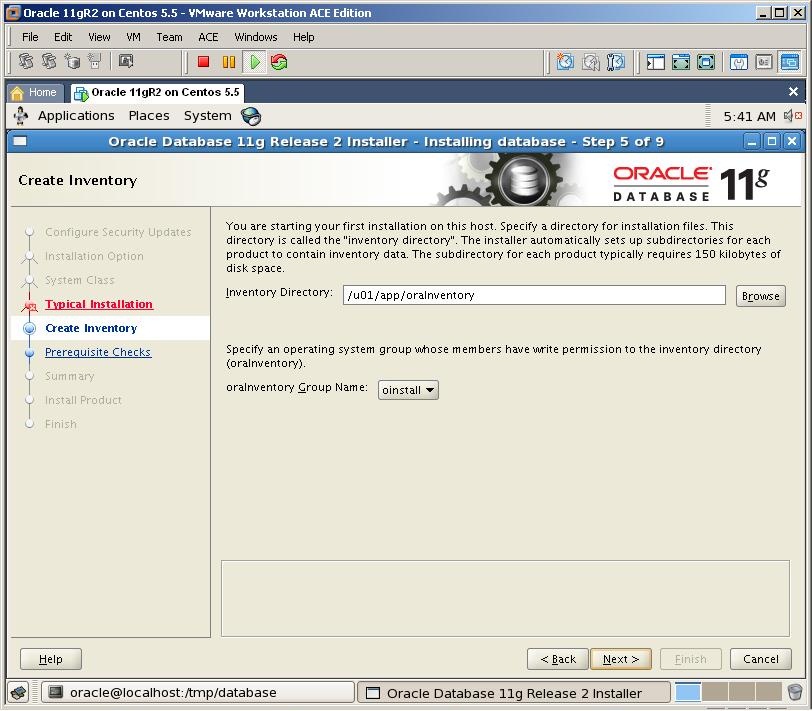
Specify the folder for the inventory directory and click Next

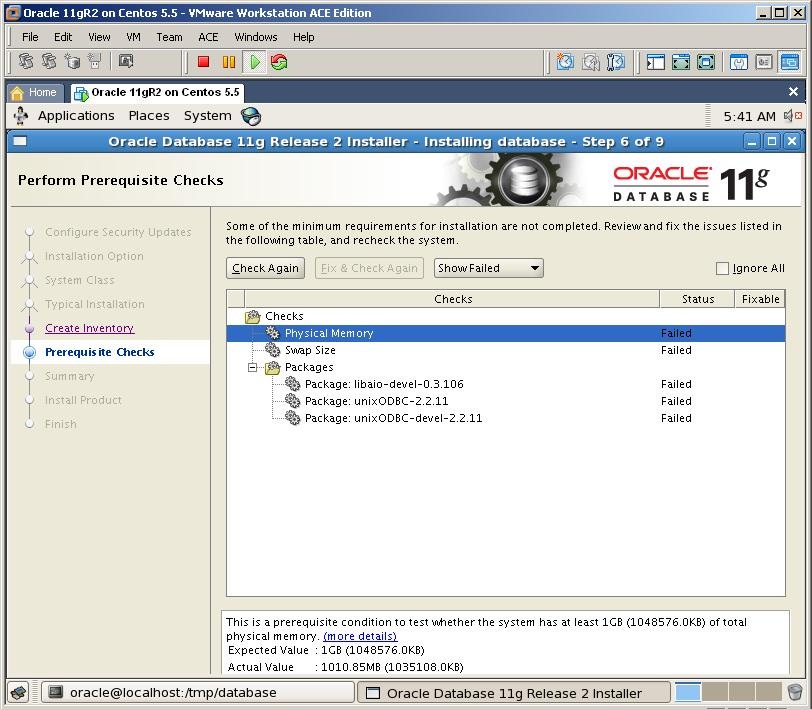
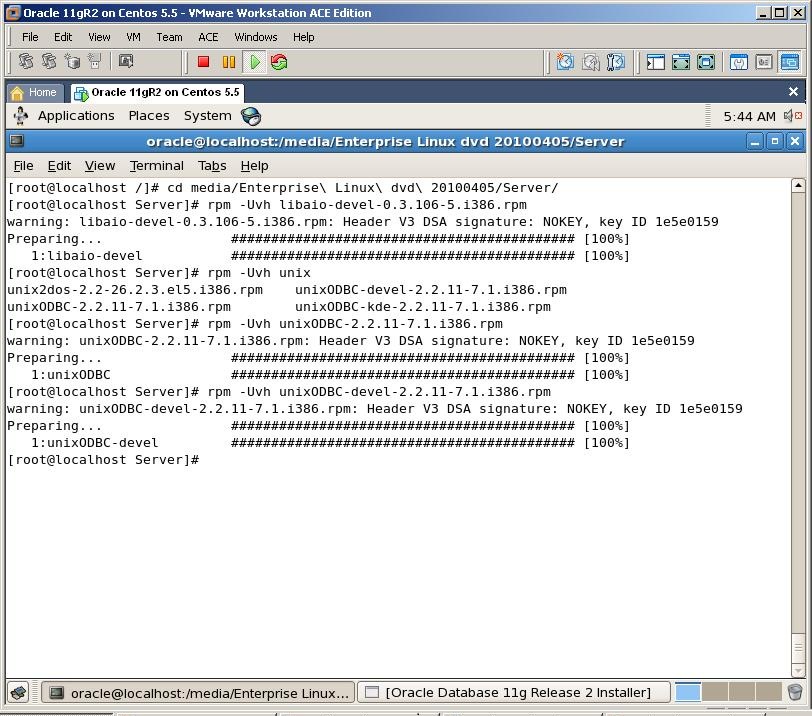
In the prerequisite check we was informed that we need to install three packages as well. So mount the .iso file of the OEL installation, switch to the Server folder

Install all three packages with rpm -Uvh command as it’s shown above

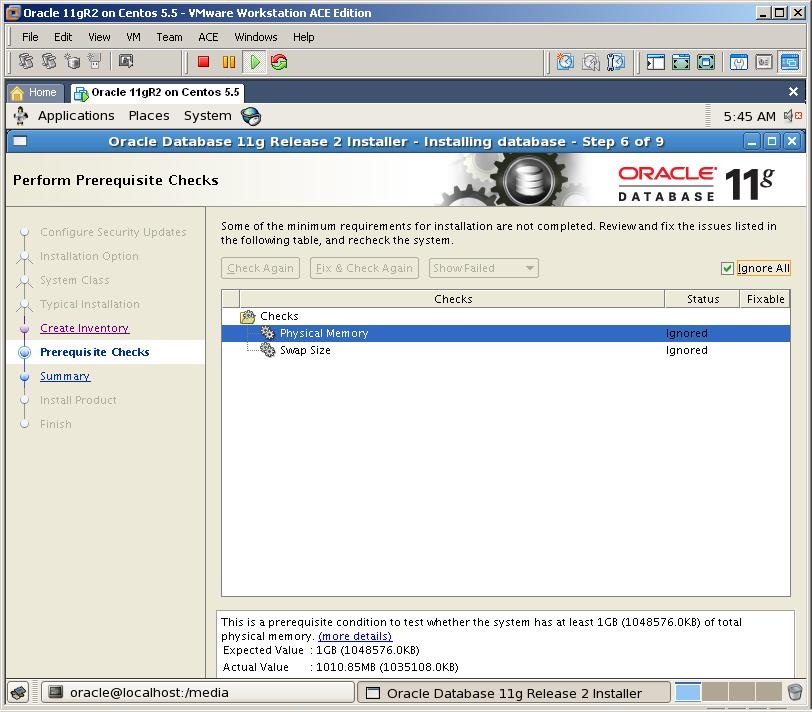
Click on Check Again button and you’ll see that those notifications are disappeared. Check “Ignore all” checkbox and click Next

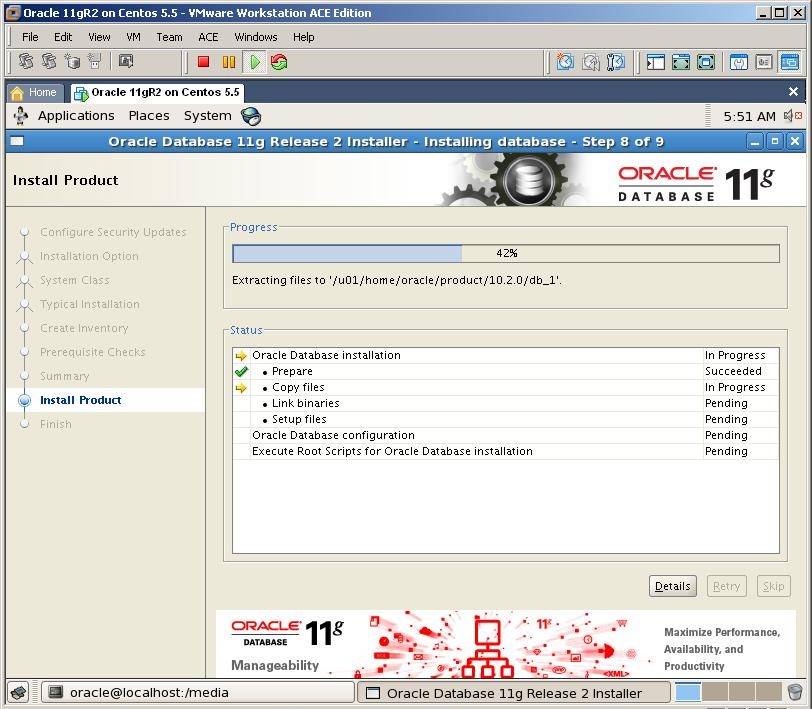
Click Finish button to start the installation


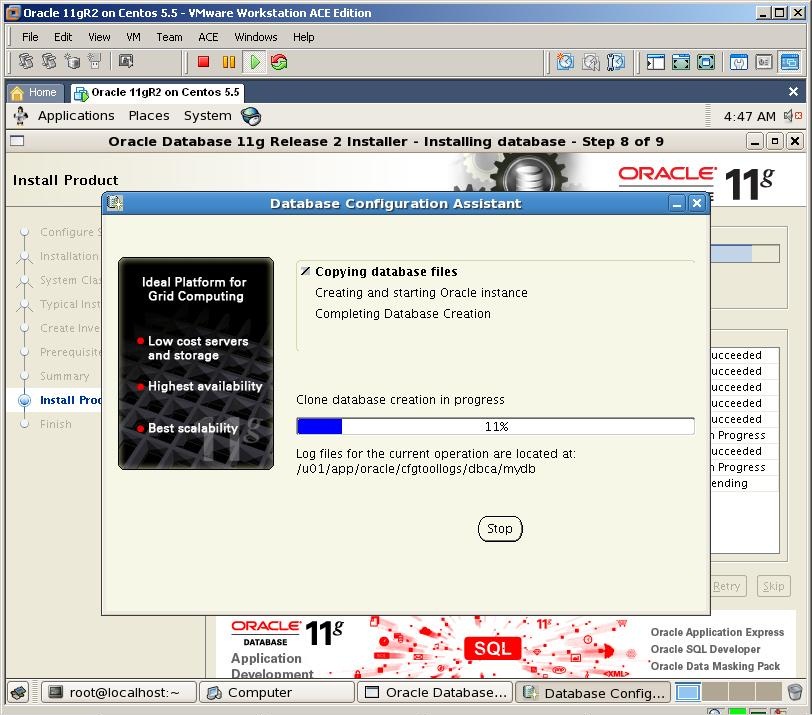
DBCA tools automatically will start to create the database named mydb

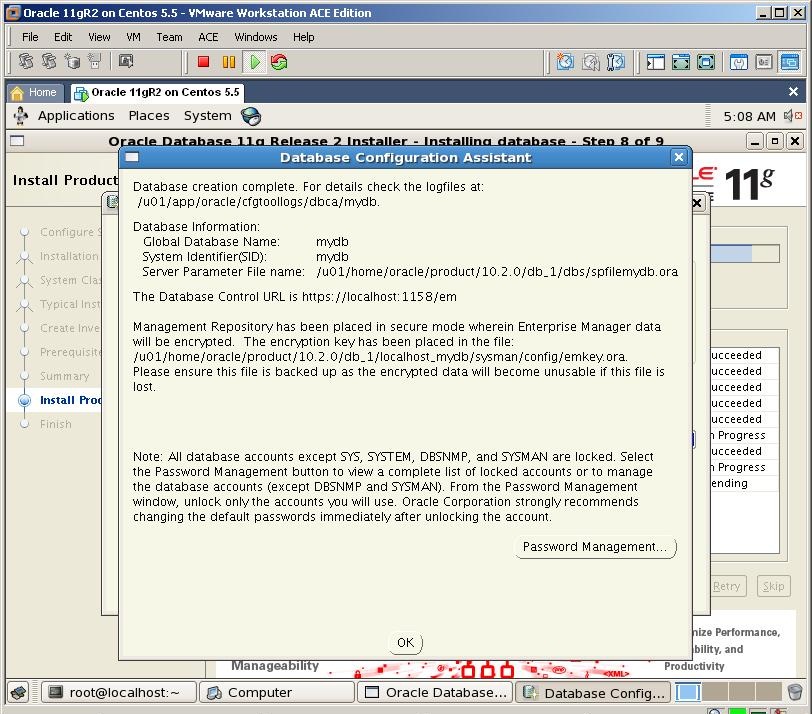
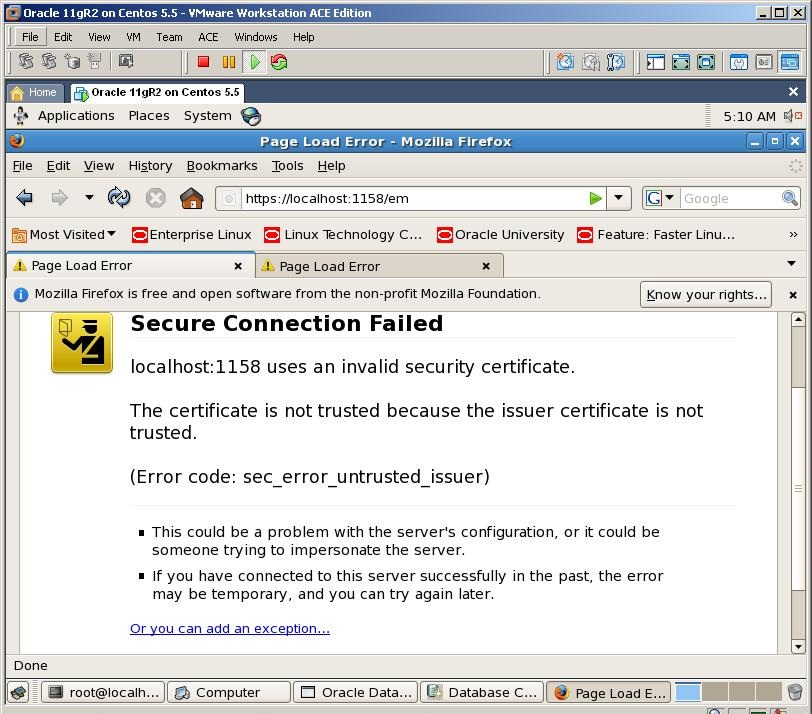
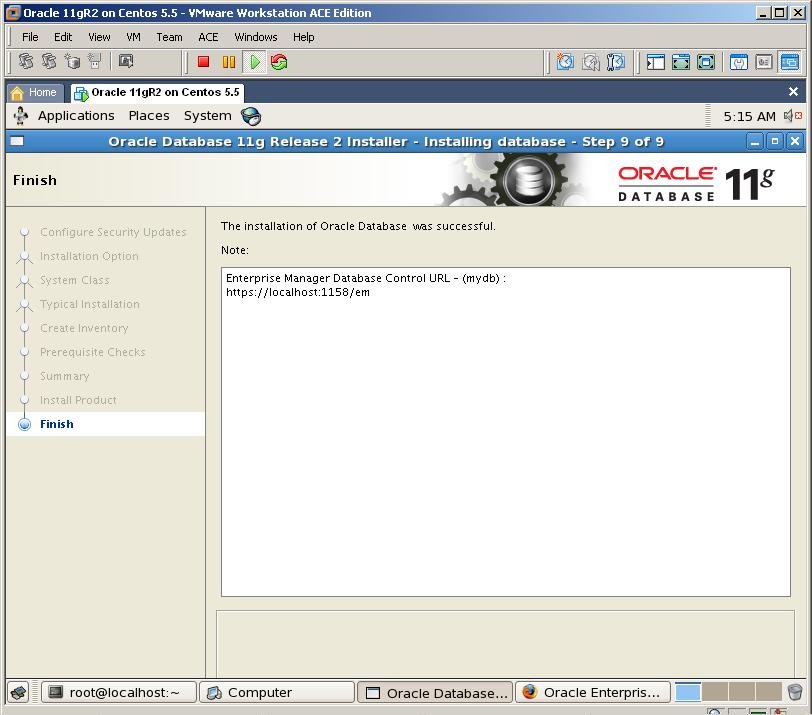
After all, the installation finished successfully. Get the url of the database control

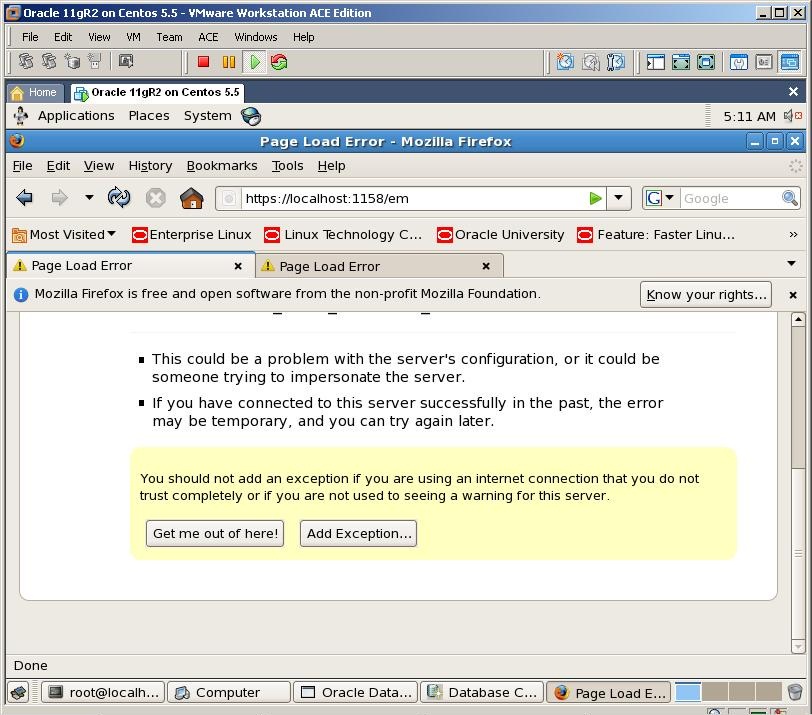
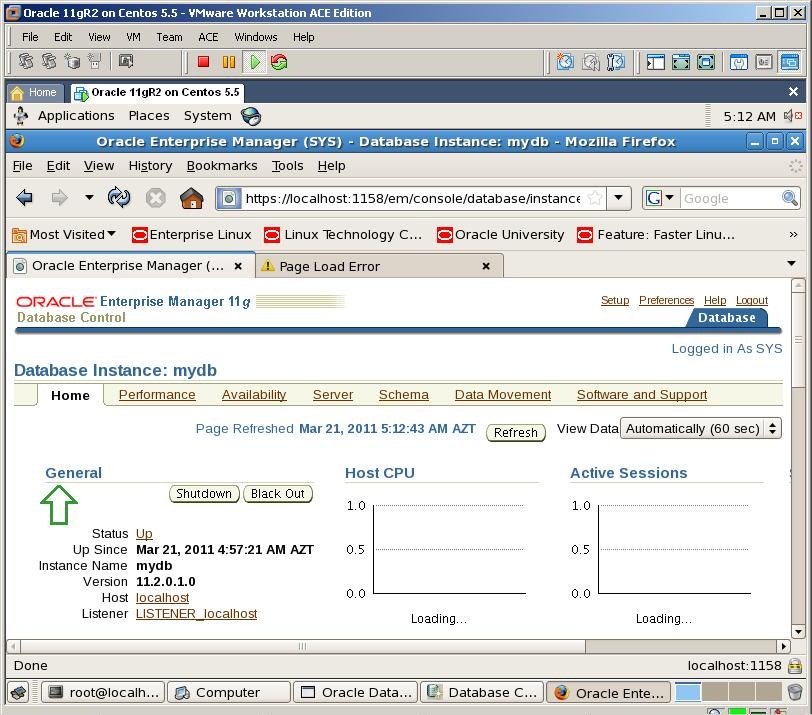
Open a web browser and paste that url to the address field. Click “or you can add an exception” link

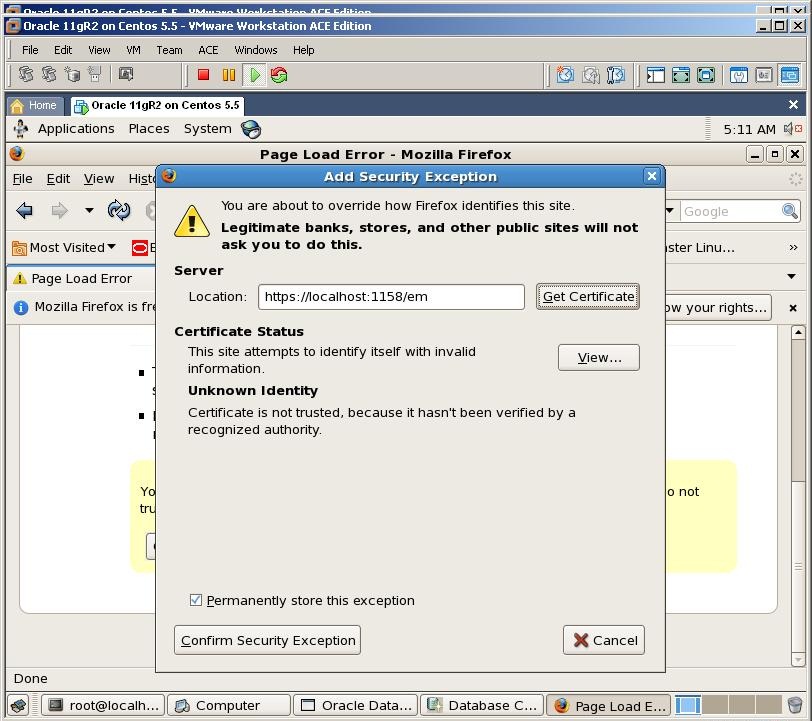
Click on “Add Exception” button

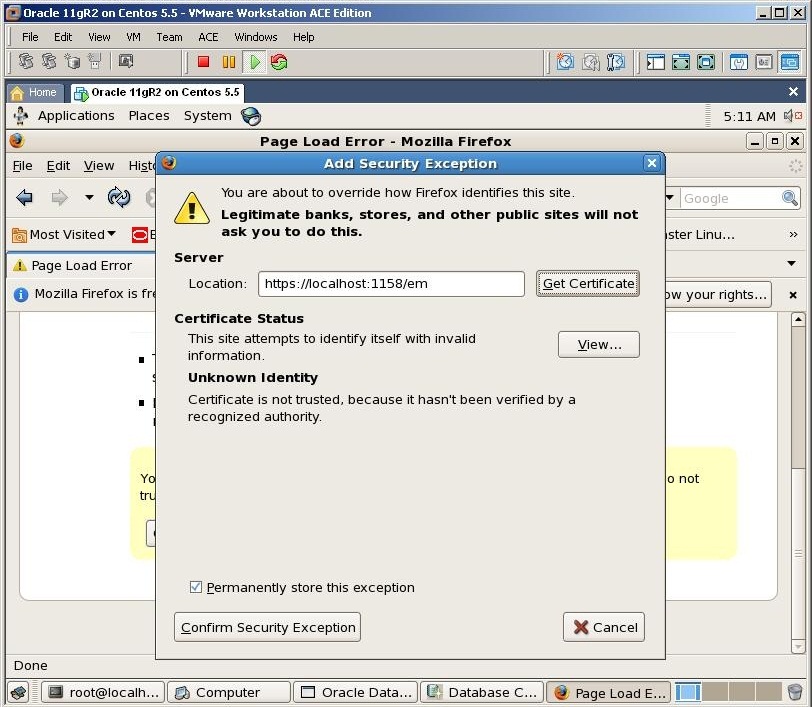
Click Get Certificate and Confirm Security Exception buttons


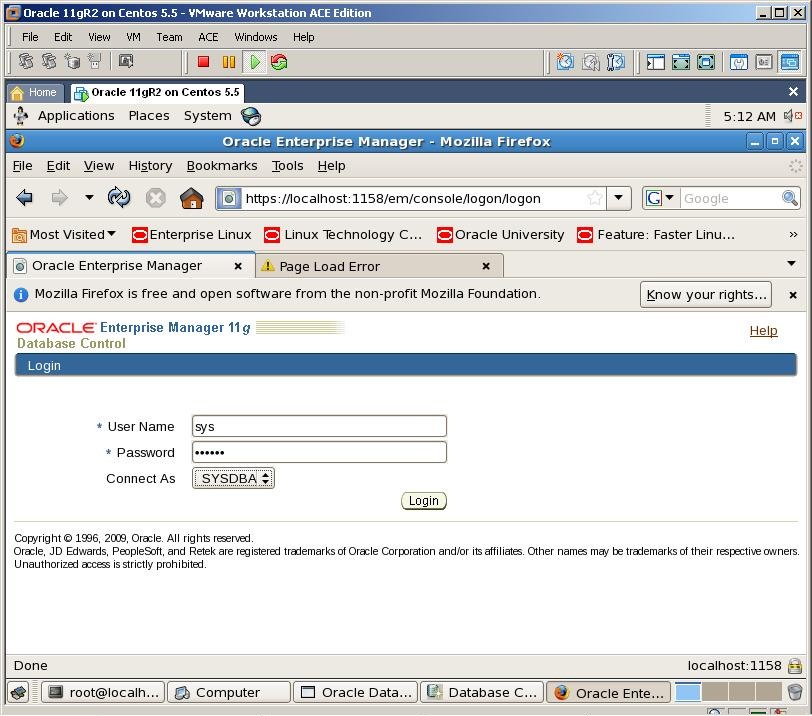
Provide the password for sys user and password, select SYSDBA and click Login button


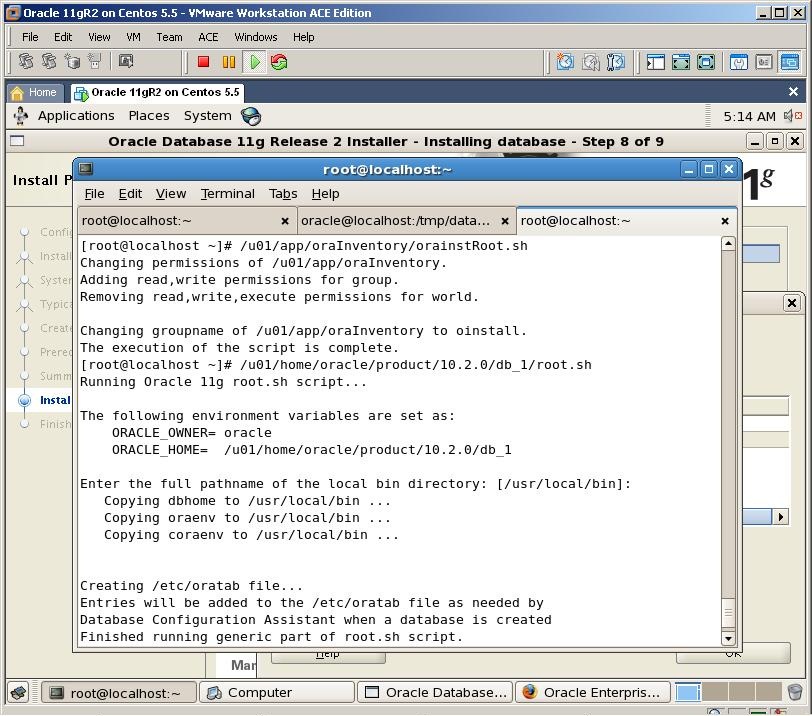
Switch to the installation page and run both shell scripts with root user


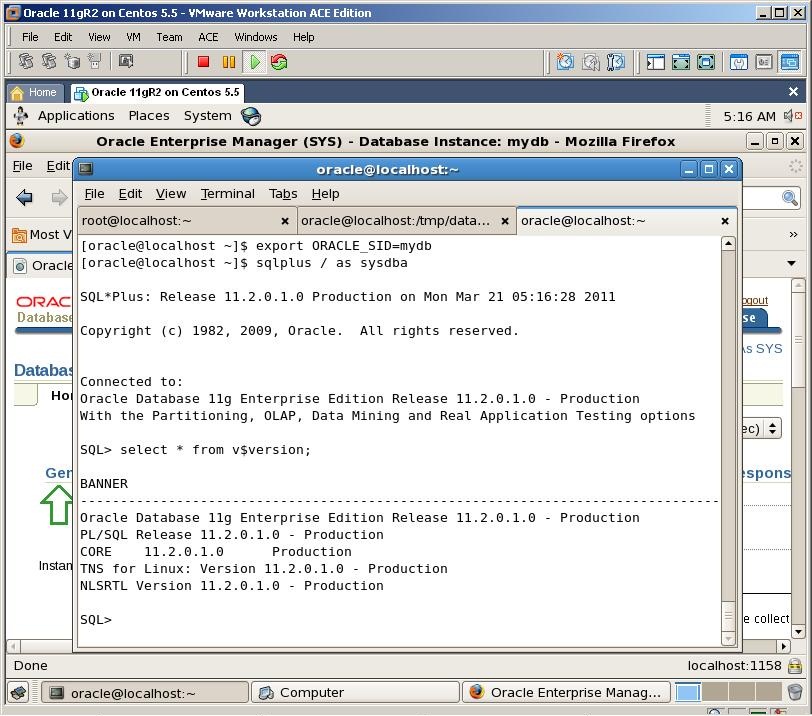
Open a new terminal, export ORACLE_SID variable and connect to the database
I hope by following my step by step instruction, you’ll also install Oracle 11gR2 on OEL successfully
Read More
Posted in Oracle Database | No comments
Older Posts Home
Subscribe to: Posts (Atom)

Popular Posts

  • [Informatica] Informatica Service is not Configured to run Impacted Session
    When I executed the informatica task using DAC, I got the below message despite the fact that all the sessions were refreshed and validated....
  • OBIEE 11g - MBean attribute access denied.
    I installed OBIEE 11.1.1.6.8 on my machine. Installation went fine and I could log in to the front end for the first time. When I   checked ...
  • OBIEE 11g - State: HY000. Code: 10058. [NQODBC] [SQL_STATE: HY000] [nQSError: 10058] A general error has occurred. [nQSError: 46118] Out of disk space. (HY000)
    Error Details Error Codes: AAD5E5X3:OPR4ONWY:U9IM8TAC Odbc driver returned an error (SQLFetchScroll). State: HY000. Code: 10058. [NQODBC] [S...
  • Informatica Powercenter Workflow Manager Repository Navigator docking float issue
    In case you’re also experiencing where your Repository Navigator is not dock or attached and it seems just floating within Workflow Manager ...
  • [OBIEE11g] - OBIEE Dashboard for Informatica Metadata Reporting
    The metadata that Informatica Power Center 8 retains in its repository can be exposed via OBIEE reports and dashboards. This metadata includ...
  • [OBIEE11g] - Drill Down to Sub Reports Passing Multiple Prompts Values
    People who are familiar with passing multiple parameter values to drill down reports using the GO-URL can now take a breath of fresh air. In...
  • OBIEE 11g not showing new dashboard in the drop down menu
    When creating New dashboard in  OBIEE 11g, I have faced with issue that dashboard name did not show up in drop down dashboard menu. 1. When ...
  • OBIEE 11g Hide/Show Sections based on Dashboard Prompt
    allow a user’s interaction to hide/show certain sections of a dashboard. In this particular case the user wanted to choose either ‘Quarterly...
  • [OBIEE11g] - Creating Dashboard Traversing Through Graph
    The general requirement asked for by customers is that they want to Click on the Main Dashboard Page’s Graph and be transferred to the other...
  • OBIEE 11g - Query Limit
    Query limit and number of minutes a query can run per physical layer database connection, follow the below steps. > Login to Repository u...

Categories

  • BI Publisher
  • DAC
  • DataWarehouse
  • Hyperion
  • Informatica
  • OBIEE
  • ODI
  • Oracle Applications EBS 12.1.3
  • Oracle Database
  • PL/SQL
  • SQL
  • Unix/Linux

Blog Archive

  • ▼  2013 (500)
    • ▼  November (8)
      • OBIEE11g - Custom BI Time Dimension Populate Datab...
      • OBIEE 11g - Enable Report Performance Improvement ...
      • OBIEE11g - Enable Log-Level from Advanced Tab
      • OBIEE11g - Calculating First Day of Year, Quarter,...
      • OBIEE11g - Changing Default Chart Colors
      • Error : [nQSError: 13015] You do not have the perm...
      • OBIEE 11g - Query Limit
      • OBIEE 11g - Query for Yesterday Date
    • ►  October (1)
    • ►  July (4)
    • ►  June (9)
    • ►  May (15)
    • ►  April (24)
    • ►  March (43)
    • ►  February (73)
    • ►  January (323)
Powered by Blogger.

About Me

Unknown
View my complete profile