


Part 1 : Installing the OS.
1) Go to > https://edelivery.oracle.com/EPD/Search/handle_go and download the OEL5.8 update ISo as shown below.

[Note : Reason for going OEL5.8 instead of OEL 6 or hight version is , I read somewhere that OEL6 supports only 11.2.0.3 Database. If you go to oracle site to download database you can see (11.2.0.1.0) version only to download.]
2) Put your ISO as input to your Vm as shown below and click next . Adjust your RAM to atleast 4GB in the configuration hardware window


3)

4) Just Skip the test


[root@Venkat ~]# cd Desktop/
[root@Venkat Desktop]# cd vmware-tools-distrib/
[root@Venkat vmware-tools-distrib]# ls
bin doc etc FILES INSTALL installer lib vmware-install.pl
[root@Venkat vmware-tools-distrib]# ./vmware-install.pl
Creating a new VMware Tools installer database using the tar4 format.
[yes] yes
want? [yes] yes
The installation of VMware Tools 9.2.0 build-799703 for Linux completed
successfully. You can decide to remove this software from your system at any
time by invoking the following command: "/usr/bin/vmware-uninstall-tools.pl".
this program to invoke the command for you now? [yes]
Initializing...
Making sure services for VMware Tools are stopped.
Stopping VMware Tools services in the virtual machine:
Guest operating system daemon: [ OK ]
Unmounting HGFS shares: [ OK ]
Guest filesystem driver: [ OK ]
The VMware FileSystem Sync Driver (vmsync) allows external third-party backup
software that is integrated with vSphere to create backups of the virtual
machine. Do you wish to enable this feature? [no] no
Before you can compile modules, you need to have the following installed...
kernel headers of the running kernel
Searching for GCC...
Detected GCC binary at "/usr/bin/gcc".
The path "/usr/bin/gcc" appears to be a valid path to the gcc binary.
Would you like to change it? [no] no
"/lib/modules/2.6.32-300.10.1.el5uek/build/include".
The path "/lib/modules/2.6.32-300.10.1.el5uek/build/include" appears to be a
valid path to the 2.6.32-300.10.1.el5uek kernel headers.
Would you like to change it? [no] no
/usr/bin/make -C /lib/modules/2.6.32-300.10.1.el5uek/build/include/.. SUBDIRS=$PWD SRCROOT=$PWD/. \
MODULEBUILDDIR= modules
make[1]: Entering directory `/usr/src/kernels/2.6.32-300.10.1.el5uek'
CC [M] /tmp/modconfig-gSYLLn/vmci-only/linux/driver.o
CC [M] /tmp/modconfig-gSYLLn/vmci-only/linux/vmciKernelIf.o
CC [M] /tmp/modconfig-gSYLLn/vmci-only/common/vmciContext.o
CC [M] /tmp/modconfig-gSYLLn/vmci-only/common/vmciDatagram.o
CC [M] /tmp/modconfig-gSYLLn/vmci-only/common/vmciDoorbell.o
CC [M] /tmp/modconfig-gSYLLn/vmci-only/common/vmciDriver.o
CC [M] /tmp/modconfig-gSYLLn/vmci-only/common/vmciEvent.o
CC [M] /tmp/modconfig-gSYLLn/vmci-only/common/vmciHashtable.o
CC [M] /tmp/modconfig-gSYLLn/vmci-only/common/vmciQPair.o
CC [M] /tmp/modconfig-gSYLLn/vmci-only/common/vmciQueuePair.o
CC [M] /tmp/modconfig-gSYLLn/vmci-only/common/vmciResource.o
CC [M] /tmp/modconfig-gSYLLn/vmci-only/common/vmciRoute.o
CC [M] /tmp/modconfig-gSYLLn/vmci-only/driverLog.o
LD [M] /tmp/modconfig-gSYLLn/vmci-only/vmci.o
Building modules, stage 2.
MODPOST 1 modules
CC /tmp/modconfig-gSYLLn/vmci-only/vmci.mod.o
LD [M] /tmp/modconfig-gSYLLn/vmci-only/vmci.ko.unsigned
NO SIGN [M] /tmp/modconfig-gSYLLn/vmci-only/vmci.ko
make[1]: Leaving directory `/usr/src/kernels/2.6.32-300.10.1.el5uek'
/usr/bin/make -C $PWD SRCROOT=$PWD/. \
MODULEBUILDDIR= postbuild
make[1]: Entering directory `/tmp/modconfig-gSYLLn/vmci-only'
make[1]: `postbuild' is up to date.
make[1]: Leaving directory `/tmp/modconfig-gSYLLn/vmci-only'
cp -f vmci.ko ./../vmci.o
make: Leaving directory `/tmp/modconfig-gSYLLn/vmci-only'
/usr/bin/make -C /lib/modules/2.6.32-300.10.1.el5uek/build/include/.. SUBDIRS=$PWD SRCROOT=$PWD/. \
MODULEBUILDDIR= modules
make[1]: Entering directory `/usr/src/kernels/2.6.32-300.10.1.el5uek'
CC [M] /tmp/modconfig-D0cUX1/vmci-only/linux/driver.o
CC [M] /tmp/modconfig-D0cUX1/vmci-only/linux/vmciKernelIf.o
CC [M] /tmp/modconfig-D0cUX1/vmci-only/common/vmciContext.o
CC [M] /tmp/modconfig-D0cUX1/vmci-only/common/vmciDatagram.o
CC [M] /tmp/modconfig-D0cUX1/vmci-only/common/vmciDoorbell.o
CC [M] /tmp/modconfig-D0cUX1/vmci-only/common/vmciDriver.o
CC [M] /tmp/modconfig-D0cUX1/vmci-only/common/vmciEvent.o
CC [M] /tmp/modconfig-D0cUX1/vmci-only/common/vmciHashtable.o
CC [M] /tmp/modconfig-D0cUX1/vmci-only/common/vmciQPair.o
CC [M] /tmp/modconfig-D0cUX1/vmci-only/common/vmciQueuePair.o
CC [M] /tmp/modconfig-D0cUX1/vmci-only/common/vmciResource.o
CC [M] /tmp/modconfig-D0cUX1/vmci-only/common/vmciRoute.o
CC [M] /tmp/modconfig-D0cUX1/vmci-only/driverLog.o
LD [M] /tmp/modconfig-D0cUX1/vmci-only/vmci.o
Building modules, stage 2.
MODPOST 1 modules
CC /tmp/modconfig-D0cUX1/vmci-only/vmci.mod.o
LD [M] /tmp/modconfig-D0cUX1/vmci-only/vmci.ko.unsigned
NO SIGN [M] /tmp/modconfig-D0cUX1/vmci-only/vmci.ko
make[1]: Leaving directory `/usr/src/kernels/2.6.32-300.10.1.el5uek'
/usr/bin/make -C $PWD SRCROOT=$PWD/. \
MODULEBUILDDIR= postbuild
make[1]: Entering directory `/tmp/modconfig-D0cUX1/vmci-only'
make[1]: `postbuild' is up to date.
make[1]: Leaving directory `/tmp/modconfig-D0cUX1/vmci-only'
cp -f vmci.ko ./../vmci.o
make: Leaving directory `/tmp/modconfig-D0cUX1/vmci-only'
Using 2.6.x kernel build system.
make: Entering directory `/tmp/modconfig-D0cUX1/vsock-only'
/usr/bin/make -C /lib/modules/2.6.32-300.10.1.el5uek/build/include/.. SUBDIRS=$PWD SRCROOT=$PWD/. \
MODULEBUILDDIR= modules
make[1]: Entering directory `/usr/src/kernels/2.6.32-300.10.1.el5uek'
CC [M] /tmp/modconfig-D0cUX1/vsock-only/linux/af_vsock.o
CC [M] /tmp/modconfig-D0cUX1/vsock-only/linux/notify.o
CC [M] /tmp/modconfig-D0cUX1/vsock-only/linux/notifyQState.o
CC [M] /tmp/modconfig-D0cUX1/vsock-only/linux/stats.o
CC [M] /tmp/modconfig-D0cUX1/vsock-only/linux/util.o
CC [M] /tmp/modconfig-D0cUX1/vsock-only/linux/vsockAddr.o
CC [M] /tmp/modconfig-D0cUX1/vsock-only/driverLog.o
LD [M] /tmp/modconfig-D0cUX1/vsock-only/vsock.o
Building modules, stage 2.
MODPOST 1 modules
CC /tmp/modconfig-D0cUX1/vsock-only/vsock.mod.o
LD [M] /tmp/modconfig-D0cUX1/vsock-only/vsock.ko.unsigned
NO SIGN [M] /tmp/modconfig-D0cUX1/vsock-only/vsock.ko
make[1]: Leaving directory `/usr/src/kernels/2.6.32-300.10.1.el5uek'
/usr/bin/make -C $PWD SRCROOT=$PWD/. \
MODULEBUILDDIR= postbuild
make[1]: Entering directory `/tmp/modconfig-D0cUX1/vsock-only'
make[1]: `postbuild' is up to date.
make[1]: Leaving directory `/tmp/modconfig-D0cUX1/vsock-only'
cp -f vsock.ko ./../vsock.o
make: Leaving directory `/tmp/modconfig-D0cUX1/vsock-only'
--clobber-kernel-modules=vmxnet3 to override.
--clobber-kernel-modules=pvscsi to override.
--clobber-kernel-modules=vmmemctl to override.
to enable this feature? [yes] yes
/usr/bin/make -C /lib/modules/2.6.32-300.10.1.el5uek/build/include/.. SUBDIRS=$PWD SRCROOT=$PWD/. \
MODULEBUILDDIR= modules
make[1]: Entering directory `/usr/src/kernels/2.6.32-300.10.1.el5uek'
CC [M] /tmp/modconfig-OwX16v/vmci-only/linux/driver.o
CC [M] /tmp/modconfig-OwX16v/vmci-only/linux/vmciKernelIf.o
CC [M] /tmp/modconfig-OwX16v/vmci-only/common/vmciContext.o
CC [M] /tmp/modconfig-OwX16v/vmci-only/common/vmciDatagram.o
CC [M] /tmp/modconfig-OwX16v/vmci-only/common/vmciDoorbell.o
CC [M] /tmp/modconfig-OwX16v/vmci-only/common/vmciDriver.o
CC [M] /tmp/modconfig-OwX16v/vmci-only/common/vmciEvent.o
CC [M] /tmp/modconfig-OwX16v/vmci-only/common/vmciHashtable.o
CC [M] /tmp/modconfig-OwX16v/vmci-only/common/vmciQPair.o
CC [M] /tmp/modconfig-OwX16v/vmci-only/common/vmciQueuePair.o
CC [M] /tmp/modconfig-OwX16v/vmci-only/common/vmciResource.o
CC [M] /tmp/modconfig-OwX16v/vmci-only/common/vmciRoute.o
CC [M] /tmp/modconfig-OwX16v/vmci-only/driverLog.o
LD [M] /tmp/modconfig-OwX16v/vmci-only/vmci.o
Building modules, stage 2.
MODPOST 1 modules
CC /tmp/modconfig-OwX16v/vmci-only/vmci.mod.o
LD [M] /tmp/modconfig-OwX16v/vmci-only/vmci.ko.unsigned
NO SIGN [M] /tmp/modconfig-OwX16v/vmci-only/vmci.ko
make[1]: Leaving directory `/usr/src/kernels/2.6.32-300.10.1.el5uek'
/usr/bin/make -C $PWD SRCROOT=$PWD/. \
MODULEBUILDDIR= postbuild
make[1]: Entering directory `/tmp/modconfig-OwX16v/vmci-only'
make[1]: `postbuild' is up to date.
make[1]: Leaving directory `/tmp/modconfig-OwX16v/vmci-only'
cp -f vmci.ko ./../vmci.o
make: Leaving directory `/tmp/modconfig-OwX16v/vmci-only'
Using 2.6.x kernel build system.
make: Entering directory `/tmp/modconfig-OwX16v/vmhgfs-only'
/usr/bin/make -C /lib/modules/2.6.32-300.10.1.el5uek/build/include/.. SUBDIRS=$PWD SRCROOT=$PWD/. \
MODULEBUILDDIR= modules
make[1]: Entering directory `/usr/src/kernels/2.6.32-300.10.1.el5uek'
CC [M] /tmp/modconfig-OwX16v/vmhgfs-only/backdoor.o
CC [M] /tmp/modconfig-OwX16v/vmhgfs-only/backdoorGcc64.o
CC [M] /tmp/modconfig-OwX16v/vmhgfs-only/bdhandler.o
CC [M] /tmp/modconfig-OwX16v/vmhgfs-only/cpName.o
CC [M] /tmp/modconfig-OwX16v/vmhgfs-only/cpNameLinux.o
CC [M] /tmp/modconfig-OwX16v/vmhgfs-only/cpNameLite.o
CC [M] /tmp/modconfig-OwX16v/vmhgfs-only/dentry.o
CC [M] /tmp/modconfig-OwX16v/vmhgfs-only/dir.o
CC [M] /tmp/modconfig-OwX16v/vmhgfs-only/file.o
CC [M] /tmp/modconfig-OwX16v/vmhgfs-only/filesystem.o
CC [M] /tmp/modconfig-OwX16v/vmhgfs-only/fsutil.o
CC [M] /tmp/modconfig-OwX16v/vmhgfs-only/hgfsBd.o
CC [M] /tmp/modconfig-OwX16v/vmhgfs-only/hgfsEscape.o
CC [M] /tmp/modconfig-OwX16v/vmhgfs-only/hgfsUtil.o
CC [M] /tmp/modconfig-OwX16v/vmhgfs-only/inode.o
CC [M] /tmp/modconfig-OwX16v/vmhgfs-only/link.o
CC [M] /tmp/modconfig-OwX16v/vmhgfs-only/message.o
CC [M] /tmp/modconfig-OwX16v/vmhgfs-only/module.o
CC [M] /tmp/modconfig-OwX16v/vmhgfs-only/page.o
CC [M] /tmp/modconfig-OwX16v/vmhgfs-only/request.o
CC [M] /tmp/modconfig-OwX16v/vmhgfs-only/rpcout.o
CC [M] /tmp/modconfig-OwX16v/vmhgfs-only/stubs.o
CC [M] /tmp/modconfig-OwX16v/vmhgfs-only/super.o
CC [M] /tmp/modconfig-OwX16v/vmhgfs-only/tcp.o
CC [M] /tmp/modconfig-OwX16v/vmhgfs-only/transport.o
CC [M] /tmp/modconfig-OwX16v/vmhgfs-only/vmci.o
CC [M] /tmp/modconfig-OwX16v/vmhgfs-only/kernelStubsLinux.o
LD [M] /tmp/modconfig-OwX16v/vmhgfs-only/vmhgfs.o
Building modules, stage 2.
MODPOST 1 modules
CC /tmp/modconfig-OwX16v/vmhgfs-only/vmhgfs.mod.o
LD [M] /tmp/modconfig-OwX16v/vmhgfs-only/vmhgfs.ko.unsigned
NO SIGN [M] /tmp/modconfig-OwX16v/vmhgfs-only/vmhgfs.ko
make[1]: Leaving directory `/usr/src/kernels/2.6.32-300.10.1.el5uek'
/usr/bin/make -C $PWD SRCROOT=$PWD/. \
MODULEBUILDDIR= postbuild
make[1]: Entering directory `/tmp/modconfig-OwX16v/vmhgfs-only'
make[1]: `postbuild' is up to date.
make[1]: Leaving directory `/tmp/modconfig-OwX16v/vmhgfs-only'
cp -f vmhgfs.ko ./../vmhgfs.o
make: Leaving directory `/tmp/modconfig-OwX16v/vmhgfs-only'
/usr/bin/make -C /lib/modules/2.6.32-300.10.1.el5uek/build/include/.. SUBDIRS=$PWD SRCROOT=$PWD/. \
MODULEBUILDDIR= modules
make[1]: Entering directory `/usr/src/kernels/2.6.32-300.10.1.el5uek'
CC [M] /tmp/modconfig-N9jN0K/vmxnet-only/vmxnet.o
Building modules, stage 2.
MODPOST 1 modules
CC /tmp/modconfig-N9jN0K/vmxnet-only/vmxnet.mod.o
LD [M] /tmp/modconfig-N9jN0K/vmxnet-only/vmxnet.ko.unsigned
NO SIGN [M] /tmp/modconfig-N9jN0K/vmxnet-only/vmxnet.ko
make[1]: Leaving directory `/usr/src/kernels/2.6.32-300.10.1.el5uek'
/usr/bin/make -C $PWD SRCROOT=$PWD/. \
MODULEBUILDDIR= postbuild
make[1]: Entering directory `/tmp/modconfig-N9jN0K/vmxnet-only'
make[1]: `postbuild' is up to date.
make[1]: Leaving directory `/tmp/modconfig-N9jN0K/vmxnet-only'
cp -f vmxnet.ko ./../vmxnet.o
make: Leaving directory `/tmp/modconfig-N9jN0K/vmxnet-only'
[yes] yes
libraries to function properly. Please install the fuse or fuse-utils package
using your systems package management utility and re-run this script in order
to enable the VMware blocking filesystem.
VMware kernel modules at boot that are not already present. By selecting yes,
you will be enabling this experimental feature. You can always disable this
feature by re-running vmware-config-tools.pl.
Host resolution detected as "0 x 0".
Please choose one of the following display sizes that X will start with:
[3] "400x300"
[4] "512x384"
[5] "640x400"
[6] "640x480"
[7] "720x480"
[8] "800x480"
[9] "854x480"
[10] "720x576"
[11] "800x600"
[12] "1024x768"
[13] "1280x720"
[14] "1280x768"
[15] "1152x864"
[16] "1280x800"
[17] "1366x768"
[18] "1280x960"
[19] "1440x900"
[20] "1280x1024"
[21] "1400x1050"
[22] "1680x1050"
[23] "1600x1200"
[24] "1920x1080"
[25] "1920x1200"
[26] "1920x1440"
[27] "2048x1536"
[28] "2560x1600"
[29] "2560x1920"
Please enter a number between 1 and 29:
X is running fine with the new config file.
Checking acpi hot plug [ OK ]
Starting VMware Tools services in the virtual machine:
Switching to guest configuration: [ OK ]
VM communication interface: [ OK ]
VM communication interface socket family: [ OK ]
Guest filesystem driver: [ OK ]
Mounting HGFS shares: [FAILED]
Guest operating system daemon: [ OK ]
The configuration of VMware Tools 9.2.0 build-799703 for Linux for this running
kernel completed successfully.
1. Manually start /usr/bin/vmware-user
2. Log out and log back into your desktop session; and,
3. Restart your X session.

This will download the Yum Repo in the /etc/yum.repos.d


It creates the user oracle
It creates the groups oinstall and dba
It modifies the kernel parameters in /etc/sysctl.conf
It sets the hard and soft shell resource limits in /etc/security/limits.conf
And most importantly, downloads and installs number of packages which are required for the Oracle 11g database software installation while resolving the dependencies between the packages as well
Login as Root and run the following command :
Yum Install oracle-validate

This will install all the users and groups and prerequisites to install the database.
After that do the following to change the password for the user oracle created by oracle-validate RPM.


In the next post we will see how to installl Oracle database 11g R2 on Linux.
b) Add xhost - the hostname
xhost +kishore
c) Set up Oracle Profile
Login as Oracle and do vi ~/.bash_profile
Your bash_profile will be opned. Press insert and enter the highlighted text as below with your environment specific
# .bash_profile
# Get the aliases and functions
if [ -f ~/.bashrc ]; then
. ~/.bashrc
fi
# User specific environment and startup programs
PATH=$PATH:$HOME/bin
export PATH
# Oracle Settings
TMP=/tmp; export TMP
TMPDIR=$TMP; export TMPDIR
ORACLE_HOSTNAME=Venkat; export ORACLE_HOSTNAME
ORACLE_UNQNAME=DB11G; export ORACLE_UNQNAME
ORACLE_BASE=/u01/app/oracle; export ORACLE_BASE
ORACLE_HOME=$ORACLE_BASE/product/11.2.0/dbhome_1; export ORACLE_HOME
ORACLE_SID=DB11G; export ORACLE_SID
ORACLE_TERM=xterm; export ORACLE_TERM
PATH=/usr/sbin:$PATH; export PATH
"~/.bash_profile" 34L, 909C
I was planning to give OracleSID name as DB11g so I gave that name
Oracle_HOSTNAME = kishore (My host name).
If you are not sure what you host name. just do hostname in teh terminal. it will gove your host name
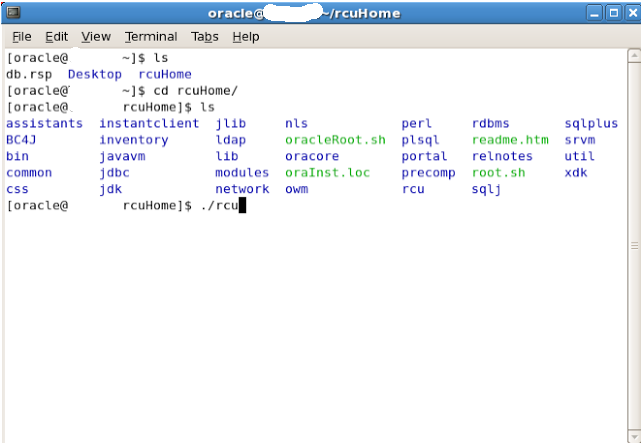
I copied my datbase installation files to the oracle Home folder. Run the Installer as follows.


Before 100 % it will ask you to excute some shell scripts.
Su as ROOT and you have to the do the following at the command prompt
1) cd /u01/app/oraInventory/orainstRoot.sh
2)/u01/app/oracle/product/11.2.0/db_1/root.sh
After Running the Shell Scripts. We have to do the following steps


1) Go to > https://edelivery.oracle.com/EPD/Search/handle_go and download the OEL5.8 update ISo as shown below.

[Note : Reason for going OEL5.8 instead of OEL 6 or hight version is , I read somewhere that OEL6 supports only 11.2.0.3 Database. If you go to oracle site to download database you can see (11.2.0.1.0) version only to download.]
2) Put your ISO as input to your Vm as shown below and click next . Adjust your RAM to atleast 4GB in the configuration hardware window


4) Just Skip the test


Disable the Firewall

SE LinuX Setting " Disable"

Don't Enable Kdump leave default and click Forward


Click Forwad and complete the steps. You are ready with the "Linux OS"
After installing the OS. The next thing is to install the VM ware tools. Installing Vmware tools will facilitate you to do copy paste between host and Guest OS in VM player.
Steps to Install VM Tools :
As shown in the below screen shot click on the install Vmware Tools.
Steps to Install VM Tools :
As shown in the below screen shot click on the install Vmware Tools.

A Vmware tools CD Icon will apprea on the desktop. Right click on it and opne the folder. When you open it,right click on the vmware tools.trg file and extract it to the desktop.

Once you extract the file vmware- tools-disturb folder will be created on the desktop. At this moment you can right click on the VMware tools CD icon and select unmount to removed the CD mount of VMware tools.

Follow the steps in the above screenshot to start the vmware0install.pl .
The commonds I used to install are as follows : The input commands from me are in "Bold "
You have to be root user to install the VM tools
[root@Venkat ~]# ls
anaconda-ks.cfg Desktop install.log install.log.syslog[root@Venkat ~]# cd Desktop/
[root@Venkat Desktop]# cd vmware-tools-distrib/
[root@Venkat vmware-tools-distrib]# ls
bin doc etc FILES INSTALL installer lib vmware-install.pl
[root@Venkat vmware-tools-distrib]# ./vmware-install.pl
Installing VMware Tools.
In which directory do you want to install the binary files? [ Press Enter]
[/usr/bin] What is the directory that contains the init directories (rc0.d/ to rc6.d/)? [press Enter]
[/etc/rc.d] What is the directory that contains the init scripts? [Press Enter]
[/etc/rc.d/init.d] In which directory do you want to install the daemon files? [Press Enter]
[/usr/sbin] In which directory do you want to install the library files? [Press Enter]
[/usr/lib/vmware-tools] The path "/usr/lib/vmware-tools" does not exist currently. This program is
going to create it, including needed parent directories. Is this what you want?[yes] yes
In which directory do you want to install the documentation files? [Press Enter]
[/usr/share/doc/vmware-tools] The path "/usr/share/doc/vmware-tools" does not exist currently. This program
is going to create it, including needed parent directories. Is this what youwant? [yes] yes
successfully. You can decide to remove this software from your system at any
time by invoking the following command: "/usr/bin/vmware-uninstall-tools.pl".
Before running VMware Tools for the first time, you need to configure it by
invoking the following command: "/usr/bin/vmware-config-tools.pl". Do you wantthis program to invoke the command for you now? [yes]
Initializing...
Stopping Thinprint services in the virtual machine:
Stopping Virtual Printing daemon: doneStopping VMware Tools services in the virtual machine:
Guest operating system daemon: [ OK ]
Unmounting HGFS shares: [ OK ]
Guest filesystem driver: [ OK ]
software that is integrated with vSphere to create backups of the virtual
machine. Do you wish to enable this feature? [no] no
make
gcckernel headers of the running kernel
Detected GCC binary at "/usr/bin/gcc".
The path "/usr/bin/gcc" appears to be a valid path to the gcc binary.
Would you like to change it? [no] no
Searching for a valid kernel header path...
Detected the kernel headers at"/lib/modules/2.6.32-300.10.1.el5uek/build/include".
The path "/lib/modules/2.6.32-300.10.1.el5uek/build/include" appears to be a
valid path to the 2.6.32-300.10.1.el5uek kernel headers.
Would you like to change it? [no] no
Using 2.6.x kernel build system.
make: Entering directory `/tmp/modconfig-gSYLLn/vmci-only'/usr/bin/make -C /lib/modules/2.6.32-300.10.1.el5uek/build/include/.. SUBDIRS=$PWD SRCROOT=$PWD/. \
MODULEBUILDDIR= modules
make[1]: Entering directory `/usr/src/kernels/2.6.32-300.10.1.el5uek'
CC [M] /tmp/modconfig-gSYLLn/vmci-only/linux/driver.o
CC [M] /tmp/modconfig-gSYLLn/vmci-only/linux/vmciKernelIf.o
CC [M] /tmp/modconfig-gSYLLn/vmci-only/common/vmciContext.o
CC [M] /tmp/modconfig-gSYLLn/vmci-only/common/vmciDatagram.o
CC [M] /tmp/modconfig-gSYLLn/vmci-only/common/vmciDoorbell.o
CC [M] /tmp/modconfig-gSYLLn/vmci-only/common/vmciDriver.o
CC [M] /tmp/modconfig-gSYLLn/vmci-only/common/vmciEvent.o
CC [M] /tmp/modconfig-gSYLLn/vmci-only/common/vmciHashtable.o
CC [M] /tmp/modconfig-gSYLLn/vmci-only/common/vmciQPair.o
CC [M] /tmp/modconfig-gSYLLn/vmci-only/common/vmciQueuePair.o
CC [M] /tmp/modconfig-gSYLLn/vmci-only/common/vmciResource.o
CC [M] /tmp/modconfig-gSYLLn/vmci-only/common/vmciRoute.o
CC [M] /tmp/modconfig-gSYLLn/vmci-only/driverLog.o
LD [M] /tmp/modconfig-gSYLLn/vmci-only/vmci.o
Building modules, stage 2.
MODPOST 1 modules
CC /tmp/modconfig-gSYLLn/vmci-only/vmci.mod.o
LD [M] /tmp/modconfig-gSYLLn/vmci-only/vmci.ko.unsigned
NO SIGN [M] /tmp/modconfig-gSYLLn/vmci-only/vmci.ko
make[1]: Leaving directory `/usr/src/kernels/2.6.32-300.10.1.el5uek'
/usr/bin/make -C $PWD SRCROOT=$PWD/. \
MODULEBUILDDIR= postbuild
make[1]: Entering directory `/tmp/modconfig-gSYLLn/vmci-only'
make[1]: `postbuild' is up to date.
make[1]: Leaving directory `/tmp/modconfig-gSYLLn/vmci-only'
cp -f vmci.ko ./../vmci.o
make: Leaving directory `/tmp/modconfig-gSYLLn/vmci-only'
Using 2.6.x kernel build system.
make: Entering directory `/tmp/modconfig-D0cUX1/vmci-only'/usr/bin/make -C /lib/modules/2.6.32-300.10.1.el5uek/build/include/.. SUBDIRS=$PWD SRCROOT=$PWD/. \
MODULEBUILDDIR= modules
make[1]: Entering directory `/usr/src/kernels/2.6.32-300.10.1.el5uek'
CC [M] /tmp/modconfig-D0cUX1/vmci-only/linux/driver.o
CC [M] /tmp/modconfig-D0cUX1/vmci-only/linux/vmciKernelIf.o
CC [M] /tmp/modconfig-D0cUX1/vmci-only/common/vmciContext.o
CC [M] /tmp/modconfig-D0cUX1/vmci-only/common/vmciDatagram.o
CC [M] /tmp/modconfig-D0cUX1/vmci-only/common/vmciDoorbell.o
CC [M] /tmp/modconfig-D0cUX1/vmci-only/common/vmciDriver.o
CC [M] /tmp/modconfig-D0cUX1/vmci-only/common/vmciEvent.o
CC [M] /tmp/modconfig-D0cUX1/vmci-only/common/vmciHashtable.o
CC [M] /tmp/modconfig-D0cUX1/vmci-only/common/vmciQPair.o
CC [M] /tmp/modconfig-D0cUX1/vmci-only/common/vmciQueuePair.o
CC [M] /tmp/modconfig-D0cUX1/vmci-only/common/vmciResource.o
CC [M] /tmp/modconfig-D0cUX1/vmci-only/common/vmciRoute.o
CC [M] /tmp/modconfig-D0cUX1/vmci-only/driverLog.o
LD [M] /tmp/modconfig-D0cUX1/vmci-only/vmci.o
Building modules, stage 2.
MODPOST 1 modules
CC /tmp/modconfig-D0cUX1/vmci-only/vmci.mod.o
LD [M] /tmp/modconfig-D0cUX1/vmci-only/vmci.ko.unsigned
NO SIGN [M] /tmp/modconfig-D0cUX1/vmci-only/vmci.ko
make[1]: Leaving directory `/usr/src/kernels/2.6.32-300.10.1.el5uek'
/usr/bin/make -C $PWD SRCROOT=$PWD/. \
MODULEBUILDDIR= postbuild
make[1]: Entering directory `/tmp/modconfig-D0cUX1/vmci-only'
make[1]: `postbuild' is up to date.
make[1]: Leaving directory `/tmp/modconfig-D0cUX1/vmci-only'
cp -f vmci.ko ./../vmci.o
make: Leaving directory `/tmp/modconfig-D0cUX1/vmci-only'
Using 2.6.x kernel build system.
make: Entering directory `/tmp/modconfig-D0cUX1/vsock-only'
/usr/bin/make -C /lib/modules/2.6.32-300.10.1.el5uek/build/include/.. SUBDIRS=$PWD SRCROOT=$PWD/. \
MODULEBUILDDIR= modules
make[1]: Entering directory `/usr/src/kernels/2.6.32-300.10.1.el5uek'
CC [M] /tmp/modconfig-D0cUX1/vsock-only/linux/af_vsock.o
CC [M] /tmp/modconfig-D0cUX1/vsock-only/linux/notify.o
CC [M] /tmp/modconfig-D0cUX1/vsock-only/linux/notifyQState.o
CC [M] /tmp/modconfig-D0cUX1/vsock-only/linux/stats.o
CC [M] /tmp/modconfig-D0cUX1/vsock-only/linux/util.o
CC [M] /tmp/modconfig-D0cUX1/vsock-only/linux/vsockAddr.o
CC [M] /tmp/modconfig-D0cUX1/vsock-only/driverLog.o
LD [M] /tmp/modconfig-D0cUX1/vsock-only/vsock.o
Building modules, stage 2.
MODPOST 1 modules
CC /tmp/modconfig-D0cUX1/vsock-only/vsock.mod.o
LD [M] /tmp/modconfig-D0cUX1/vsock-only/vsock.ko.unsigned
NO SIGN [M] /tmp/modconfig-D0cUX1/vsock-only/vsock.ko
make[1]: Leaving directory `/usr/src/kernels/2.6.32-300.10.1.el5uek'
/usr/bin/make -C $PWD SRCROOT=$PWD/. \
MODULEBUILDDIR= postbuild
make[1]: Entering directory `/tmp/modconfig-D0cUX1/vsock-only'
make[1]: `postbuild' is up to date.
make[1]: Leaving directory `/tmp/modconfig-D0cUX1/vsock-only'
cp -f vsock.ko ./../vsock.o
make: Leaving directory `/tmp/modconfig-D0cUX1/vsock-only'
The module vmxnet3 has already been installed on this system by another
installer or package and will not be modified by this installer. Use the flag--clobber-kernel-modules=vmxnet3 to override.
The module pvscsi has already been installed on this system by another
installer or package and will not be modified by this installer. Use the flag--clobber-kernel-modules=pvscsi to override.
The module vmmemctl has already been installed on this system by another
installer or package and will not be modified by this installer. Use the flag--clobber-kernel-modules=vmmemctl to override.
The VMware Host-Guest Filesystem allows for shared folders between the host OS
and the guest OS in a Fusion or Workstation virtual environment. Do you wishto enable this feature? [yes] yes
Using 2.6.x kernel build system.
make: Entering directory `/tmp/modconfig-OwX16v/vmci-only'/usr/bin/make -C /lib/modules/2.6.32-300.10.1.el5uek/build/include/.. SUBDIRS=$PWD SRCROOT=$PWD/. \
MODULEBUILDDIR= modules
make[1]: Entering directory `/usr/src/kernels/2.6.32-300.10.1.el5uek'
CC [M] /tmp/modconfig-OwX16v/vmci-only/linux/driver.o
CC [M] /tmp/modconfig-OwX16v/vmci-only/linux/vmciKernelIf.o
CC [M] /tmp/modconfig-OwX16v/vmci-only/common/vmciContext.o
CC [M] /tmp/modconfig-OwX16v/vmci-only/common/vmciDatagram.o
CC [M] /tmp/modconfig-OwX16v/vmci-only/common/vmciDoorbell.o
CC [M] /tmp/modconfig-OwX16v/vmci-only/common/vmciDriver.o
CC [M] /tmp/modconfig-OwX16v/vmci-only/common/vmciEvent.o
CC [M] /tmp/modconfig-OwX16v/vmci-only/common/vmciHashtable.o
CC [M] /tmp/modconfig-OwX16v/vmci-only/common/vmciQPair.o
CC [M] /tmp/modconfig-OwX16v/vmci-only/common/vmciQueuePair.o
CC [M] /tmp/modconfig-OwX16v/vmci-only/common/vmciResource.o
CC [M] /tmp/modconfig-OwX16v/vmci-only/common/vmciRoute.o
CC [M] /tmp/modconfig-OwX16v/vmci-only/driverLog.o
LD [M] /tmp/modconfig-OwX16v/vmci-only/vmci.o
Building modules, stage 2.
MODPOST 1 modules
CC /tmp/modconfig-OwX16v/vmci-only/vmci.mod.o
LD [M] /tmp/modconfig-OwX16v/vmci-only/vmci.ko.unsigned
NO SIGN [M] /tmp/modconfig-OwX16v/vmci-only/vmci.ko
make[1]: Leaving directory `/usr/src/kernels/2.6.32-300.10.1.el5uek'
/usr/bin/make -C $PWD SRCROOT=$PWD/. \
MODULEBUILDDIR= postbuild
make[1]: Entering directory `/tmp/modconfig-OwX16v/vmci-only'
make[1]: `postbuild' is up to date.
make[1]: Leaving directory `/tmp/modconfig-OwX16v/vmci-only'
cp -f vmci.ko ./../vmci.o
make: Leaving directory `/tmp/modconfig-OwX16v/vmci-only'
Using 2.6.x kernel build system.
make: Entering directory `/tmp/modconfig-OwX16v/vmhgfs-only'
/usr/bin/make -C /lib/modules/2.6.32-300.10.1.el5uek/build/include/.. SUBDIRS=$PWD SRCROOT=$PWD/. \
MODULEBUILDDIR= modules
make[1]: Entering directory `/usr/src/kernels/2.6.32-300.10.1.el5uek'
CC [M] /tmp/modconfig-OwX16v/vmhgfs-only/backdoor.o
CC [M] /tmp/modconfig-OwX16v/vmhgfs-only/backdoorGcc64.o
CC [M] /tmp/modconfig-OwX16v/vmhgfs-only/bdhandler.o
CC [M] /tmp/modconfig-OwX16v/vmhgfs-only/cpName.o
CC [M] /tmp/modconfig-OwX16v/vmhgfs-only/cpNameLinux.o
CC [M] /tmp/modconfig-OwX16v/vmhgfs-only/cpNameLite.o
CC [M] /tmp/modconfig-OwX16v/vmhgfs-only/dentry.o
CC [M] /tmp/modconfig-OwX16v/vmhgfs-only/dir.o
CC [M] /tmp/modconfig-OwX16v/vmhgfs-only/file.o
CC [M] /tmp/modconfig-OwX16v/vmhgfs-only/filesystem.o
CC [M] /tmp/modconfig-OwX16v/vmhgfs-only/fsutil.o
CC [M] /tmp/modconfig-OwX16v/vmhgfs-only/hgfsBd.o
CC [M] /tmp/modconfig-OwX16v/vmhgfs-only/hgfsEscape.o
CC [M] /tmp/modconfig-OwX16v/vmhgfs-only/hgfsUtil.o
CC [M] /tmp/modconfig-OwX16v/vmhgfs-only/inode.o
CC [M] /tmp/modconfig-OwX16v/vmhgfs-only/link.o
CC [M] /tmp/modconfig-OwX16v/vmhgfs-only/message.o
CC [M] /tmp/modconfig-OwX16v/vmhgfs-only/module.o
CC [M] /tmp/modconfig-OwX16v/vmhgfs-only/page.o
CC [M] /tmp/modconfig-OwX16v/vmhgfs-only/request.o
CC [M] /tmp/modconfig-OwX16v/vmhgfs-only/rpcout.o
CC [M] /tmp/modconfig-OwX16v/vmhgfs-only/stubs.o
CC [M] /tmp/modconfig-OwX16v/vmhgfs-only/super.o
CC [M] /tmp/modconfig-OwX16v/vmhgfs-only/tcp.o
CC [M] /tmp/modconfig-OwX16v/vmhgfs-only/transport.o
CC [M] /tmp/modconfig-OwX16v/vmhgfs-only/vmci.o
CC [M] /tmp/modconfig-OwX16v/vmhgfs-only/kernelStubsLinux.o
LD [M] /tmp/modconfig-OwX16v/vmhgfs-only/vmhgfs.o
Building modules, stage 2.
MODPOST 1 modules
CC /tmp/modconfig-OwX16v/vmhgfs-only/vmhgfs.mod.o
LD [M] /tmp/modconfig-OwX16v/vmhgfs-only/vmhgfs.ko.unsigned
NO SIGN [M] /tmp/modconfig-OwX16v/vmhgfs-only/vmhgfs.ko
make[1]: Leaving directory `/usr/src/kernels/2.6.32-300.10.1.el5uek'
/usr/bin/make -C $PWD SRCROOT=$PWD/. \
MODULEBUILDDIR= postbuild
make[1]: Entering directory `/tmp/modconfig-OwX16v/vmhgfs-only'
make[1]: `postbuild' is up to date.
make[1]: Leaving directory `/tmp/modconfig-OwX16v/vmhgfs-only'
cp -f vmhgfs.ko ./../vmhgfs.o
make: Leaving directory `/tmp/modconfig-OwX16v/vmhgfs-only'
Using 2.6.x kernel build system.
make: Entering directory `/tmp/modconfig-N9jN0K/vmxnet-only'/usr/bin/make -C /lib/modules/2.6.32-300.10.1.el5uek/build/include/.. SUBDIRS=$PWD SRCROOT=$PWD/. \
MODULEBUILDDIR= modules
make[1]: Entering directory `/usr/src/kernels/2.6.32-300.10.1.el5uek'
CC [M] /tmp/modconfig-N9jN0K/vmxnet-only/vmxnet.o
Building modules, stage 2.
MODPOST 1 modules
CC /tmp/modconfig-N9jN0K/vmxnet-only/vmxnet.mod.o
LD [M] /tmp/modconfig-N9jN0K/vmxnet-only/vmxnet.ko.unsigned
NO SIGN [M] /tmp/modconfig-N9jN0K/vmxnet-only/vmxnet.ko
make[1]: Leaving directory `/usr/src/kernels/2.6.32-300.10.1.el5uek'
/usr/bin/make -C $PWD SRCROOT=$PWD/. \
MODULEBUILDDIR= postbuild
make[1]: Entering directory `/tmp/modconfig-N9jN0K/vmxnet-only'
make[1]: `postbuild' is up to date.
make[1]: Leaving directory `/tmp/modconfig-N9jN0K/vmxnet-only'
cp -f vmxnet.ko ./../vmxnet.o
make: Leaving directory `/tmp/modconfig-N9jN0K/vmxnet-only'
The vmblock enables dragging or copying files between host and guest in a
Fusion or Workstation virtual environment. Do you wish to enable this feature?[yes] yes
NOTICE: It appears your system does not have the required fuse packages
installed. The VMware blocking filesystem requires the fuse packages and itslibraries to function properly. Please install the fuse or fuse-utils package
using your systems package management utility and re-run this script in order
to enable the VMware blocking filesystem.
!!! [EXPERIMENTAL] !!!
VMware automatic kernel modules enables automatic building and installation ofVMware kernel modules at boot that are not already present. By selecting yes,
you will be enabling this experimental feature. You can always disable this
feature by re-running vmware-config-tools.pl.
Would you like to enable VMware automatic kernel modules?
[no] Thinprint provides driver-free printing. Do you wish to enable this feature?
[yes] Detected X version 7.1
[1] "320x200"
[2] "320x240"[3] "400x300"
[4] "512x384"
[5] "640x400"
[6] "640x480"
[7] "720x480"
[8] "800x480"
[9] "854x480"
[10] "720x576"
[11] "800x600"
[12] "1024x768"
[13] "1280x720"
[14] "1280x768"
[15] "1152x864"
[16] "1280x800"
[17] "1366x768"
[18] "1280x960"
[19] "1440x900"
[20] "1280x1024"
[21] "1400x1050"
[22] "1680x1050"
[23] "1600x1200"
[24] "1920x1080"
[25] "1920x1200"
[26] "1920x1440"
[27] "2048x1536"
[28] "2560x1600"
[29] "2560x1920"
Please enter a number between 1 and 29:
[3] 12
Creating a new initrd boot image for the kernel.
Starting Virtual Printing daemon: doneChecking acpi hot plug [ OK ]
Starting VMware Tools services in the virtual machine:
Switching to guest configuration: [ OK ]
VM communication interface: [ OK ]
VM communication interface socket family: [ OK ]
Guest filesystem driver: [ OK ]
Mounting HGFS shares: [FAILED]
Guest operating system daemon: [ OK ]
The configuration of VMware Tools 9.2.0 build-799703 for Linux for this running
kernel completed successfully.
You must restart your X session before any mouse or graphics changes take
effect.You can now run VMware Tools by invoking "/usr/bin/vmware-toolbox-cmd" from the
command line.To enable advanced X features (e.g., guest resolution fit, drag and drop, and
file and text copy/paste), you will need to do one (or more) of the following:1. Manually start /usr/bin/vmware-user
2. Log out and log back into your desktop session; and,
3. Restart your X session.
After Installing Vmware Tools.
Next thing is to install YUM from the oracle Public Server.
The Oracle public yum server offers a free and convenient way to install the latest Oracle Linuxpackages as well as packages from the Oracle VM installation media via a yum client.
As my OS is OEL 5 update 8 I am install Oracle Linux 5 Repo.
Open a terminal and type the follwing commands one by one

This will download the Yum Repo in the /etc/yum.repos.d
Open the public-yum-e15.repo file and selet the appropriate [ol5_u8_base] here it is OEL5 updat e8 and chnage the enebled section from "0" to "1" as shown below.

That's it yum is installed successfully.
Installing Oracle-validate RPM:
As we all know we need to install database to install OBIEE.
Installing database on linux involves modifying ststem parameters and creating users and groups.
We need to do all these stuff manually.
To make our life easy oracle had oracle-validate rpm. Oracle-validated RPM does a number of things for us.
Login as Root and run the following command :
Yum Install oracle-validate

This will install all the users and groups and prerequisites to install the database.
After that do the following to change the password for the user oracle created by oracle-validate RPM.

Thus the prerequisites for installing the oracle database is ready and we are now all set to install the database.
Installing a common shared between host and the VM ware OS ( OEL5 update 8).
Setting a shared folder between host and vmware os willhlp us to transfer files withen two OS.
Click on Vmware machine setting and click on options. click on shared folders and Select Always Enabled. Create a folder in the host system and Add the path to the folder as shown below.
Setting a shared folder between host and vmware os willhlp us to transfer files withen two OS.
Click on Vmware machine setting and click on options. click on shared folders and Select Always Enabled. Create a folder in the host system and Add the path to the folder as shown below.

In the next post we will see how to installl Oracle database 11g R2 on Linux.
Installing the Oracle database on OEL 5.8 update :
Before going ahead with installation do the follwng steps :
a) SU As Root and Create Directories to Install the oracle database
Make Oracle directories
Before going ahead with installation do the follwng steps :
a) SU As Root and Create Directories to Install the oracle database
Make Oracle directories
 mkdir -p /u01/app/oracle/product/11.2.0/dbhome_1
 chown -R oracle:oinstall /u01/app
 chmod -R 775 /u01/app
b) Add xhost - the hostname
xhost +kishore
c) Set up Oracle Profile
Login as Oracle and do vi ~/.bash_profile
Your bash_profile will be opned. Press insert and enter the highlighted text as below with your environment specific
# .bash_profile
# Get the aliases and functions
if [ -f ~/.bashrc ]; then
. ~/.bashrc
fi
# User specific environment and startup programs
PATH=$PATH:$HOME/bin
export PATH
# Oracle Settings
TMP=/tmp; export TMP
TMPDIR=$TMP; export TMPDIR
ORACLE_HOSTNAME=Venkat; export ORACLE_HOSTNAME
ORACLE_UNQNAME=DB11G; export ORACLE_UNQNAME
ORACLE_BASE=/u01/app/oracle; export ORACLE_BASE
ORACLE_HOME=$ORACLE_BASE/product/11.2.0/dbhome_1; export ORACLE_HOME
ORACLE_SID=DB11G; export ORACLE_SID
ORACLE_TERM=xterm; export ORACLE_TERM
PATH=/usr/sbin:$PATH; export PATH
"~/.bash_profile" 34L, 909C
I was planning to give OracleSID name as DB11g so I gave that name
Oracle_HOSTNAME = kishore (My host name).
If you are not sure what you host name. just do hostname in teh terminal. it will gove your host name
I copied my datbase installation files to the oracle Home folder. Run the Installer as follows.


Before 100 % it will ask you to excute some shell scripts.
Su as ROOT and you have to the do the following at the command prompt
1) cd /u01/app/oraInventory/orainstRoot.sh
2)/u01/app/oracle/product/11.2.0/db_1/root.sh
After Running the Shell Scripts. We have to do the following steps


Database will create and once it is done you will see th epassword management Screen. lock (or) unlock schemas you want to do and clcik ok.
That's it you are done with oracle database installation


0 comments:
Post a Comment